How to Set Up a Kids' Art & Homework Area in a Small Space
This post contains affiliate links. If you make a purchase via one of these links, I may receive a small commission at no additional cost to you. All opinions are my own.
It's been gray and rainy all day, and a tornado warning was just issued in our area, so instead of making dinner, the kids and I are huddled up in the playroom in our basement watching Ferdinand (have you seen it? It's seriously so cute!) while we wait for the storm to pass. Since tornado warnings don't typically amount to much more than heavy rain and thunderstorms in our immediate vicinity, I'm not TOO worried, and I thought I'd take this time to share this little area of our house with you.
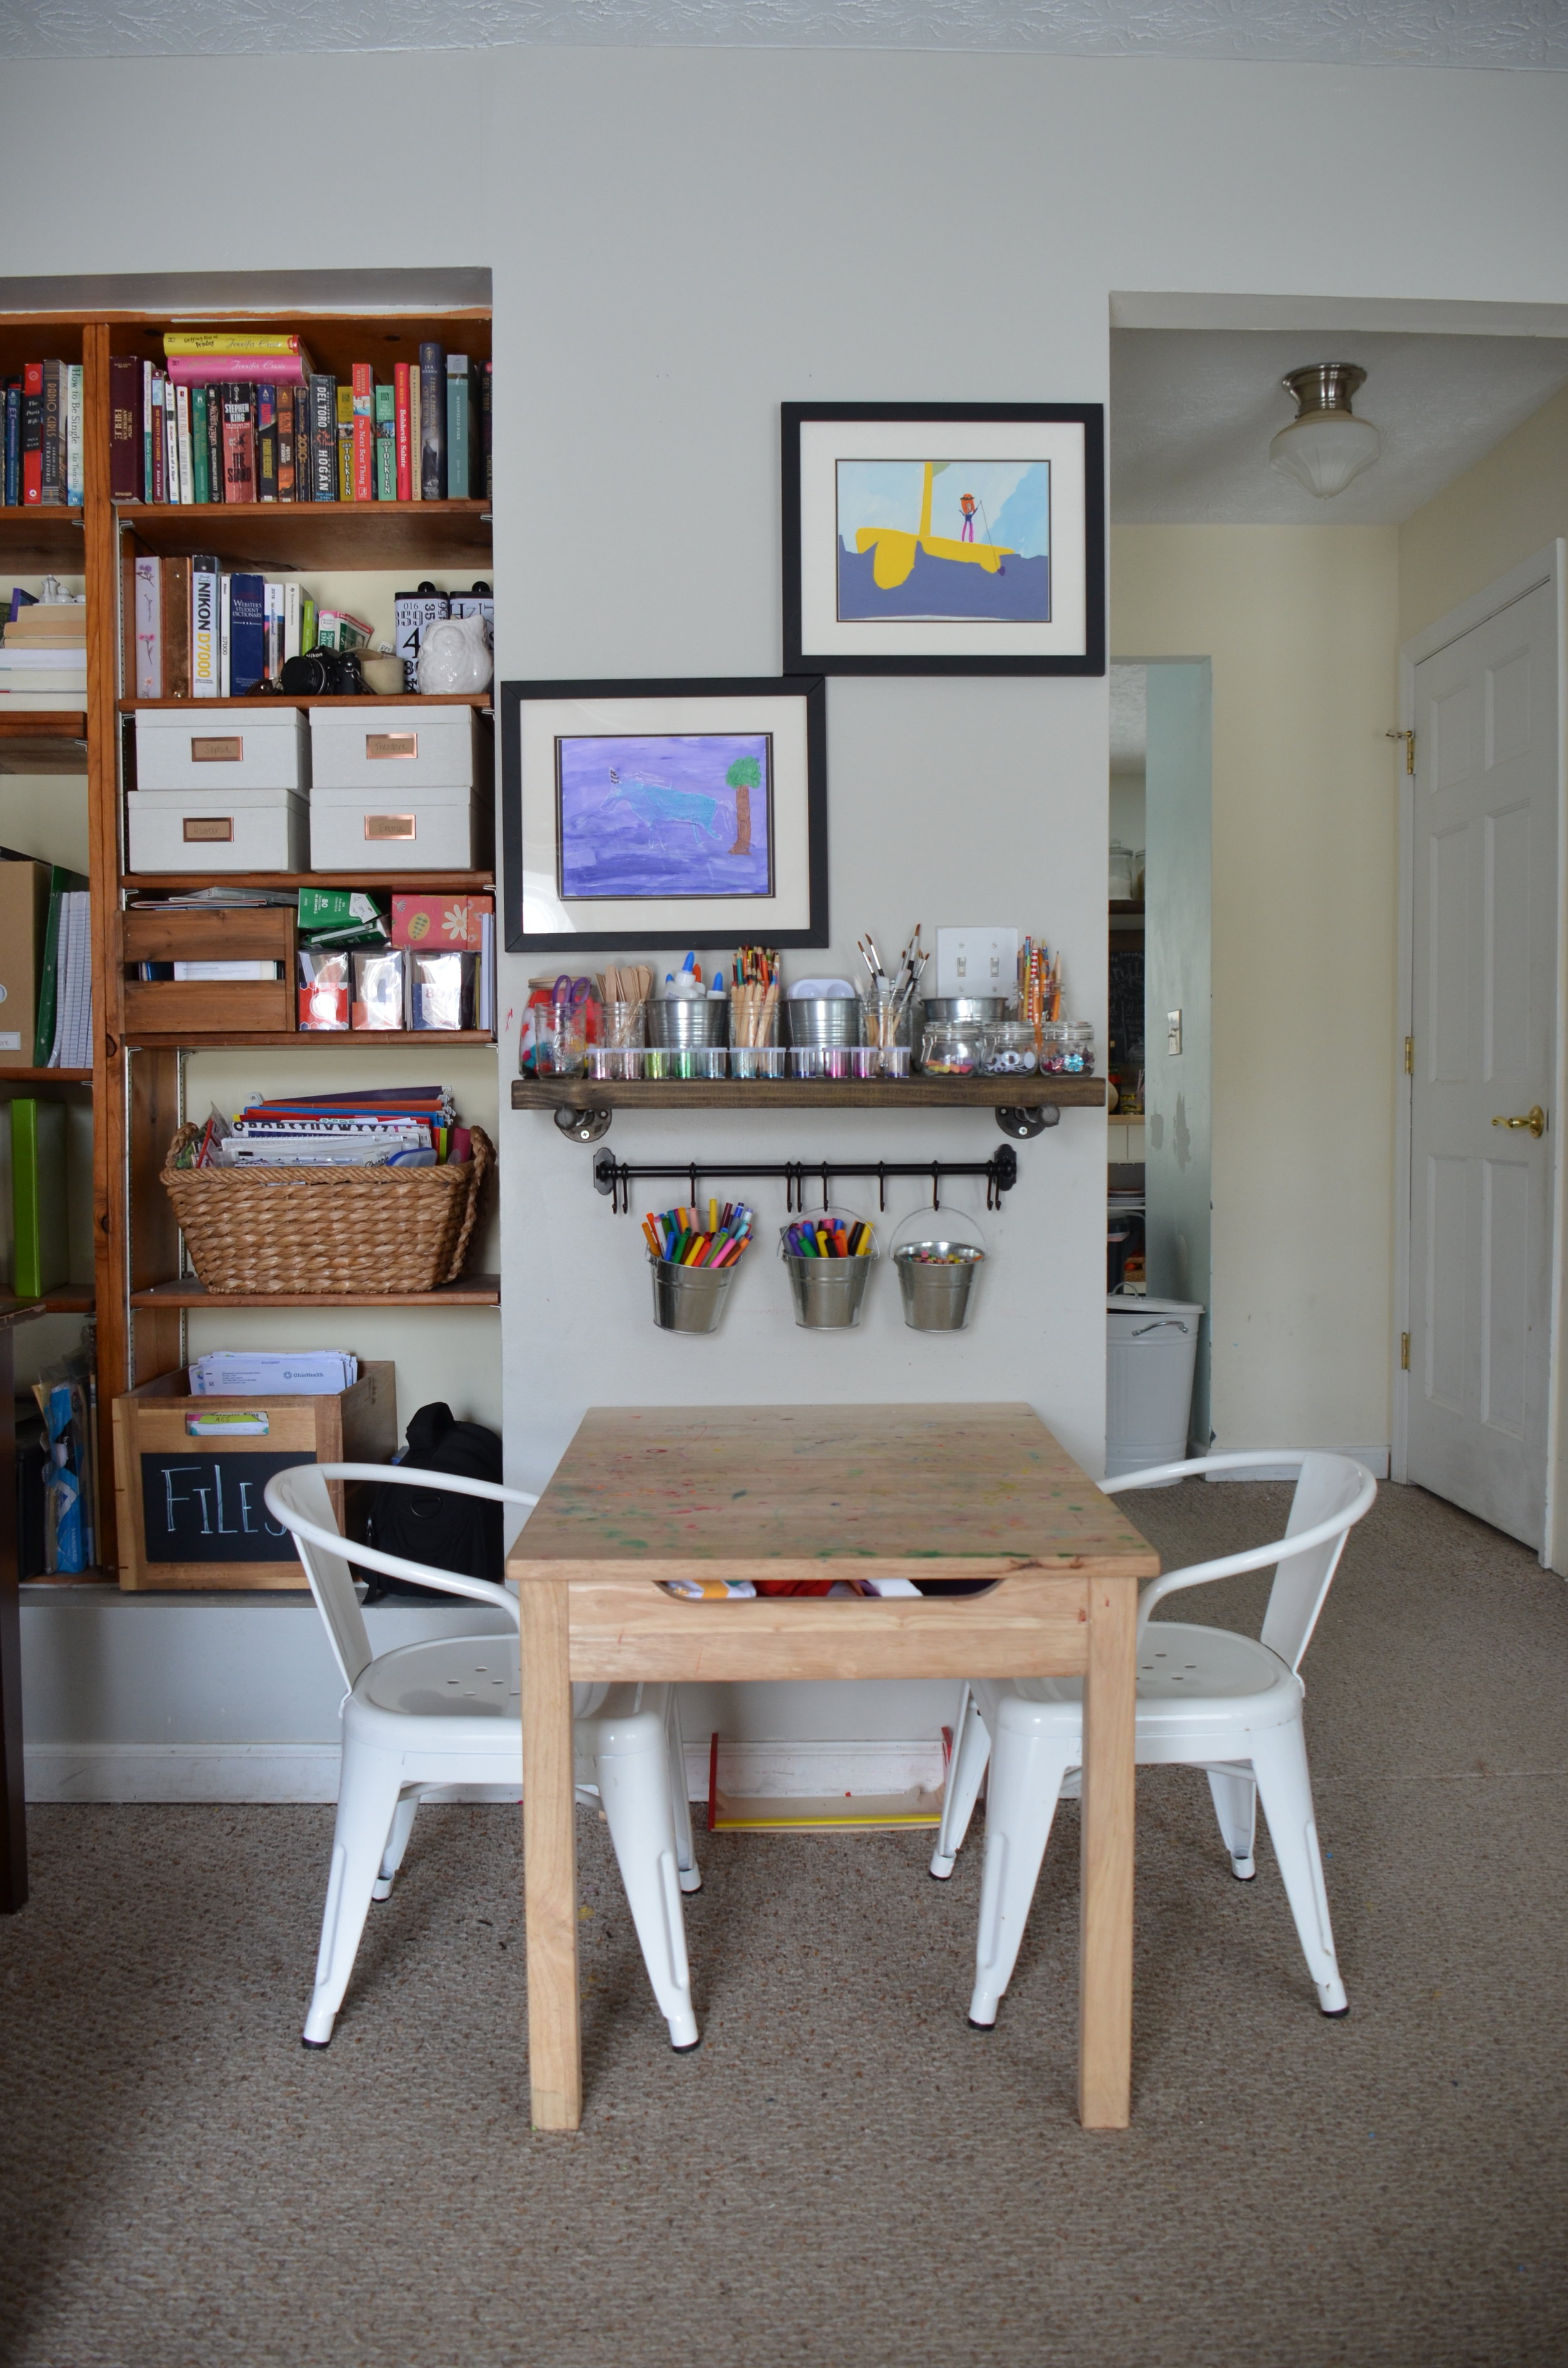
Here's the thing: our house is pretty small. When we first moved in, it seemed large, but that was 11 years and three kids ago. Despite that, I've tried to designate spaces for the kids where they can do their thing. For the longest time I wanted to have a homework & art space in our house, but it wasn't until were finally able to move the toys out of the living room (which functioned as a play room for many years) and down to the basement that I really felt like we had the space for it. So now we have our playroom in the basement, and we have this little space carved out near my desk for the kids to do homework and make art and do all the things.
When I was putting this area together, there were a few things that I wanted to make sure of:
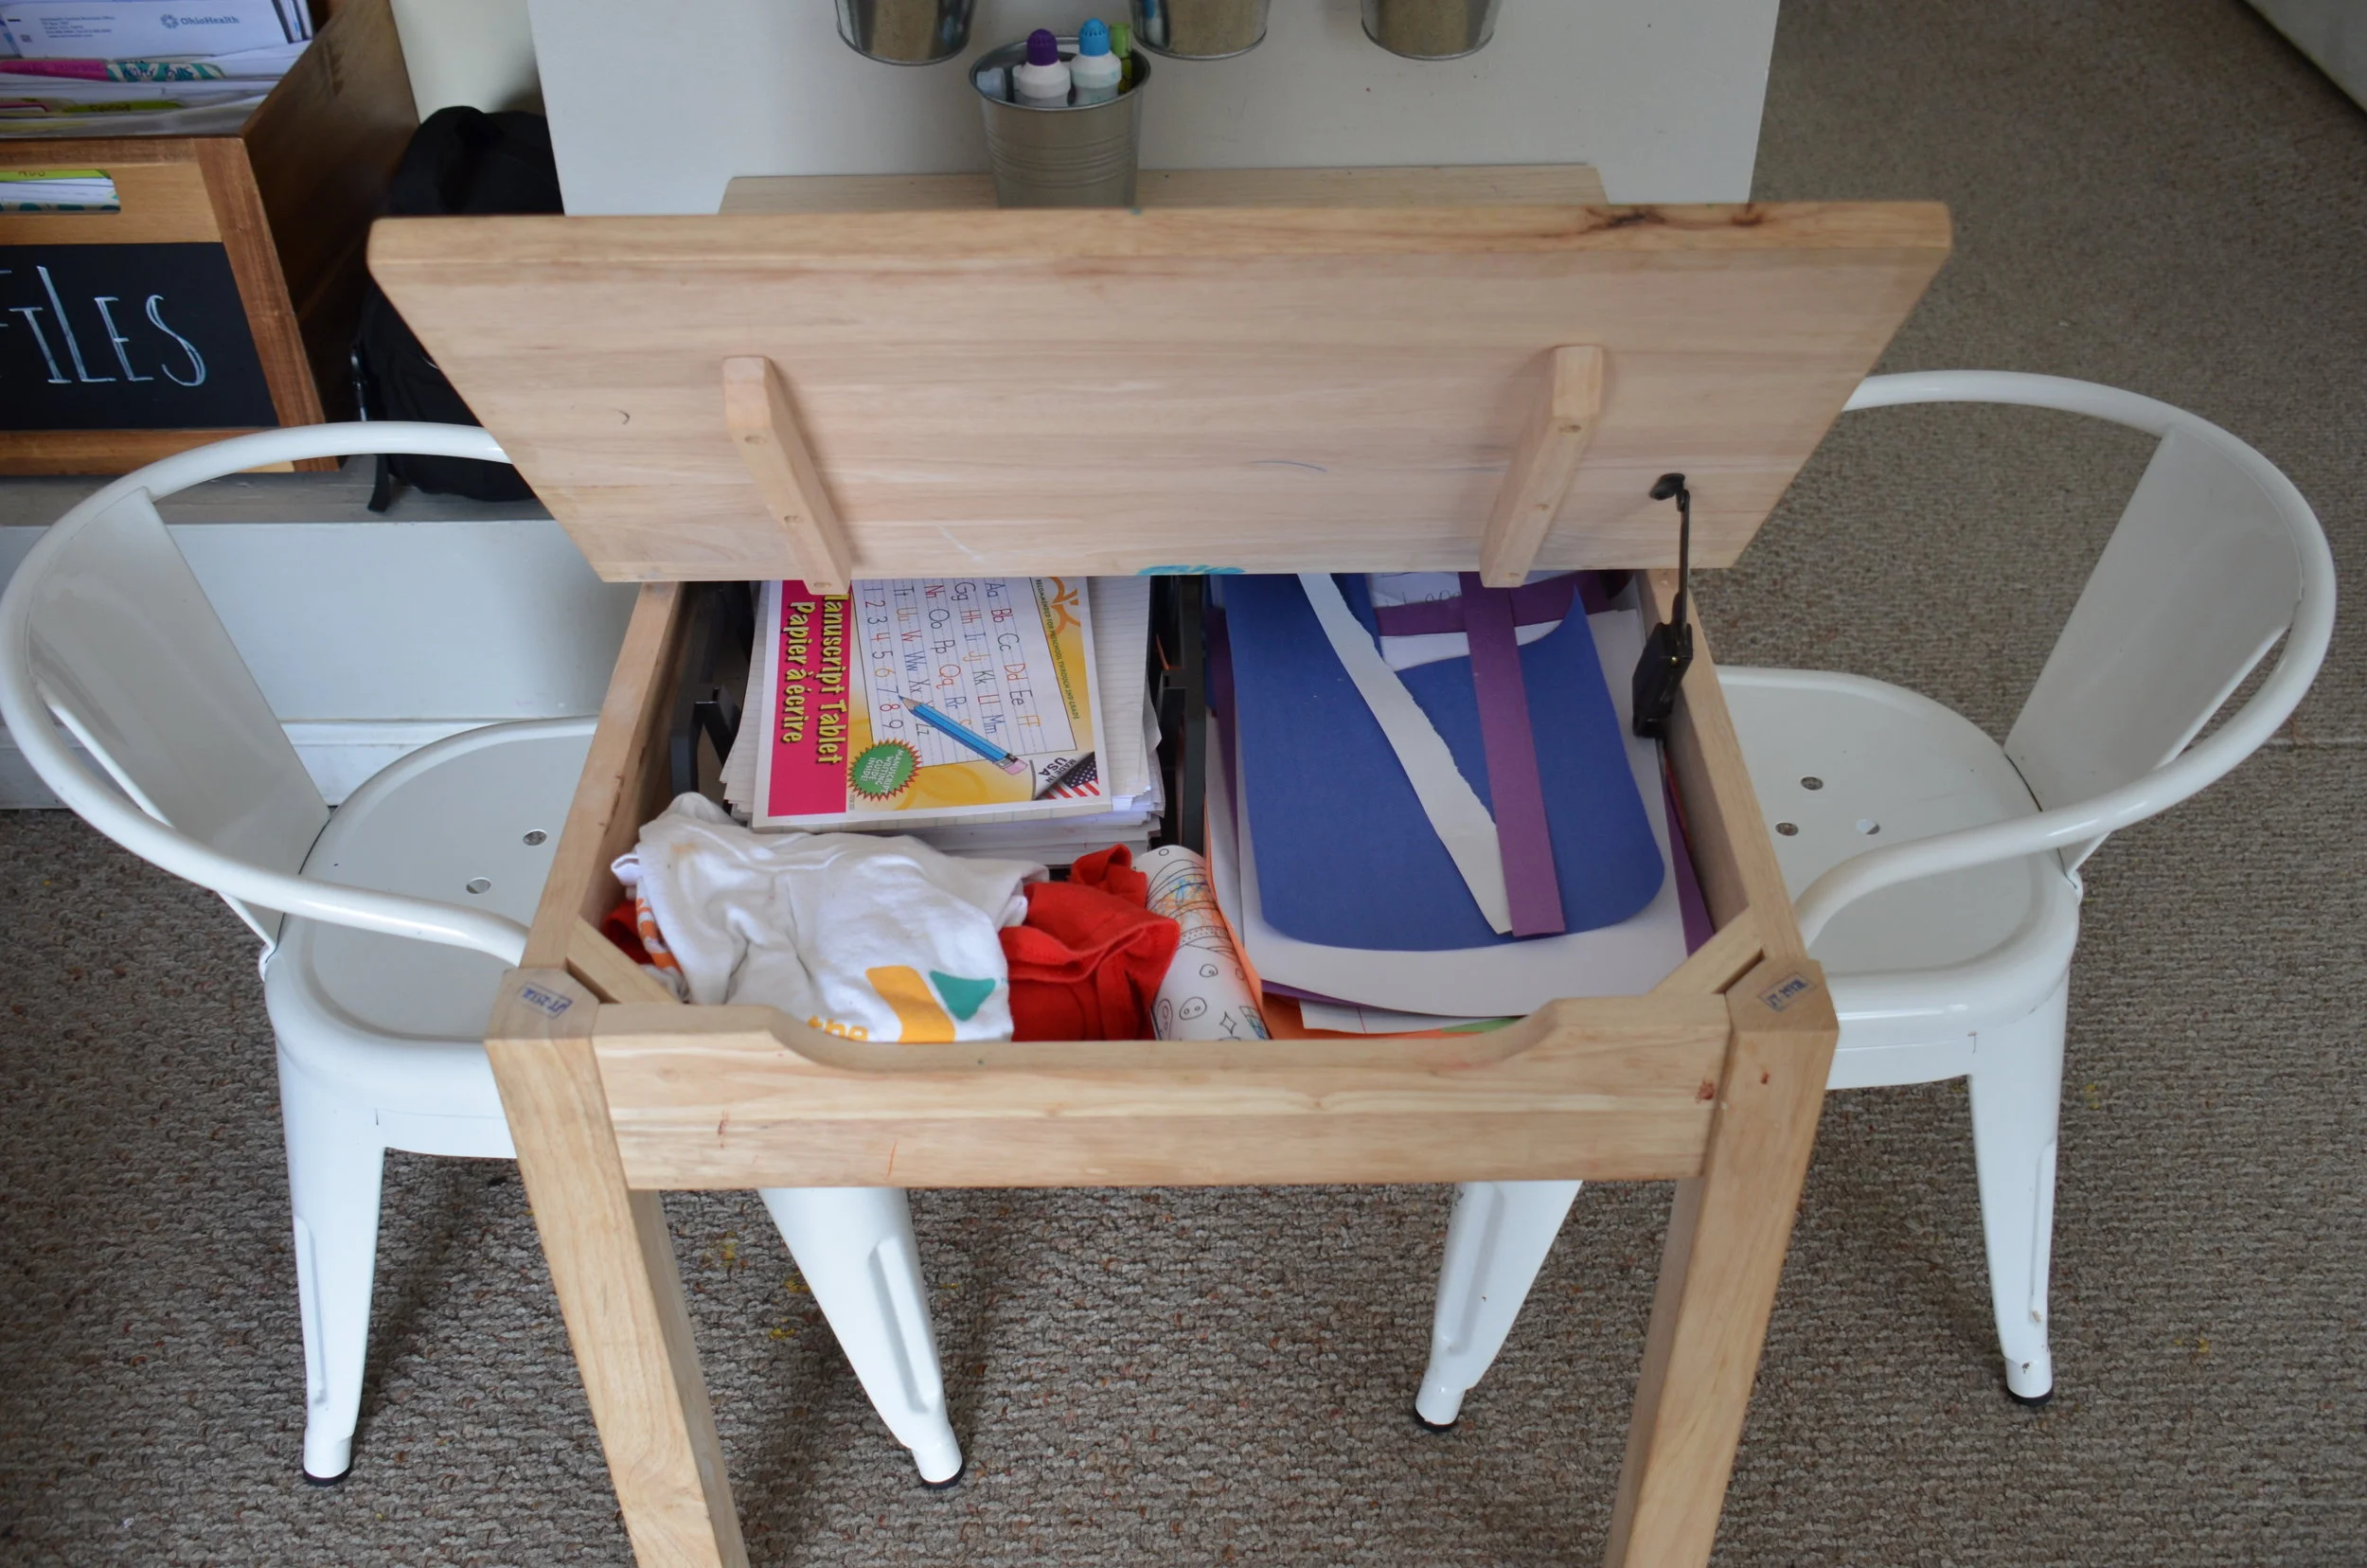
I wanted it to be child-sized. Kids can work so much better when everything fits them and is in reach. I found these industrial kids chairs at the thrift store (originally from Target, but they no longer carry them. Similar ones here). They only had one pair, but I really wish I had another pair for times when we have friends over. Someday, I'll get two more. I purchased the table from Target. I really like this table because a) it was the perfect width for this wall, b) it was rectangular rather than square, which affords the kids more room to work, and c) it helped fulfill my second-most important consideration, which was storage. Because the lid lifts up and I can keep paper and coloring pages and smocks inside it.
I wanted to have plenty of storage space in this area. We have tons of art supplies. And I mean TONS. Most of them are stored in bins in the playroom closet, but I wanted to be able to keep some out in this area all the time. AND, I wanted to be able to do it without going cazy, because clutter and mess stress me out. Having the storage table helps. For a while, I had a peg board hanging above it where we hung some of those buckets and the scissors, but all the rest of the supplies were just sitting on the edge of the table by the wall, wasting space. And the hooks kept getting knocked off the pegboard and lost, which drove me crazy. Because it takes forever for us to get projects accomplished, we dealt with that freaking pegboard for... far too long. So, I finally got Josh to help me mount this shelf, and I bought a new hanging bar & hooks (that don't come off!!) from IKEA. Now things don't disappear so easily.
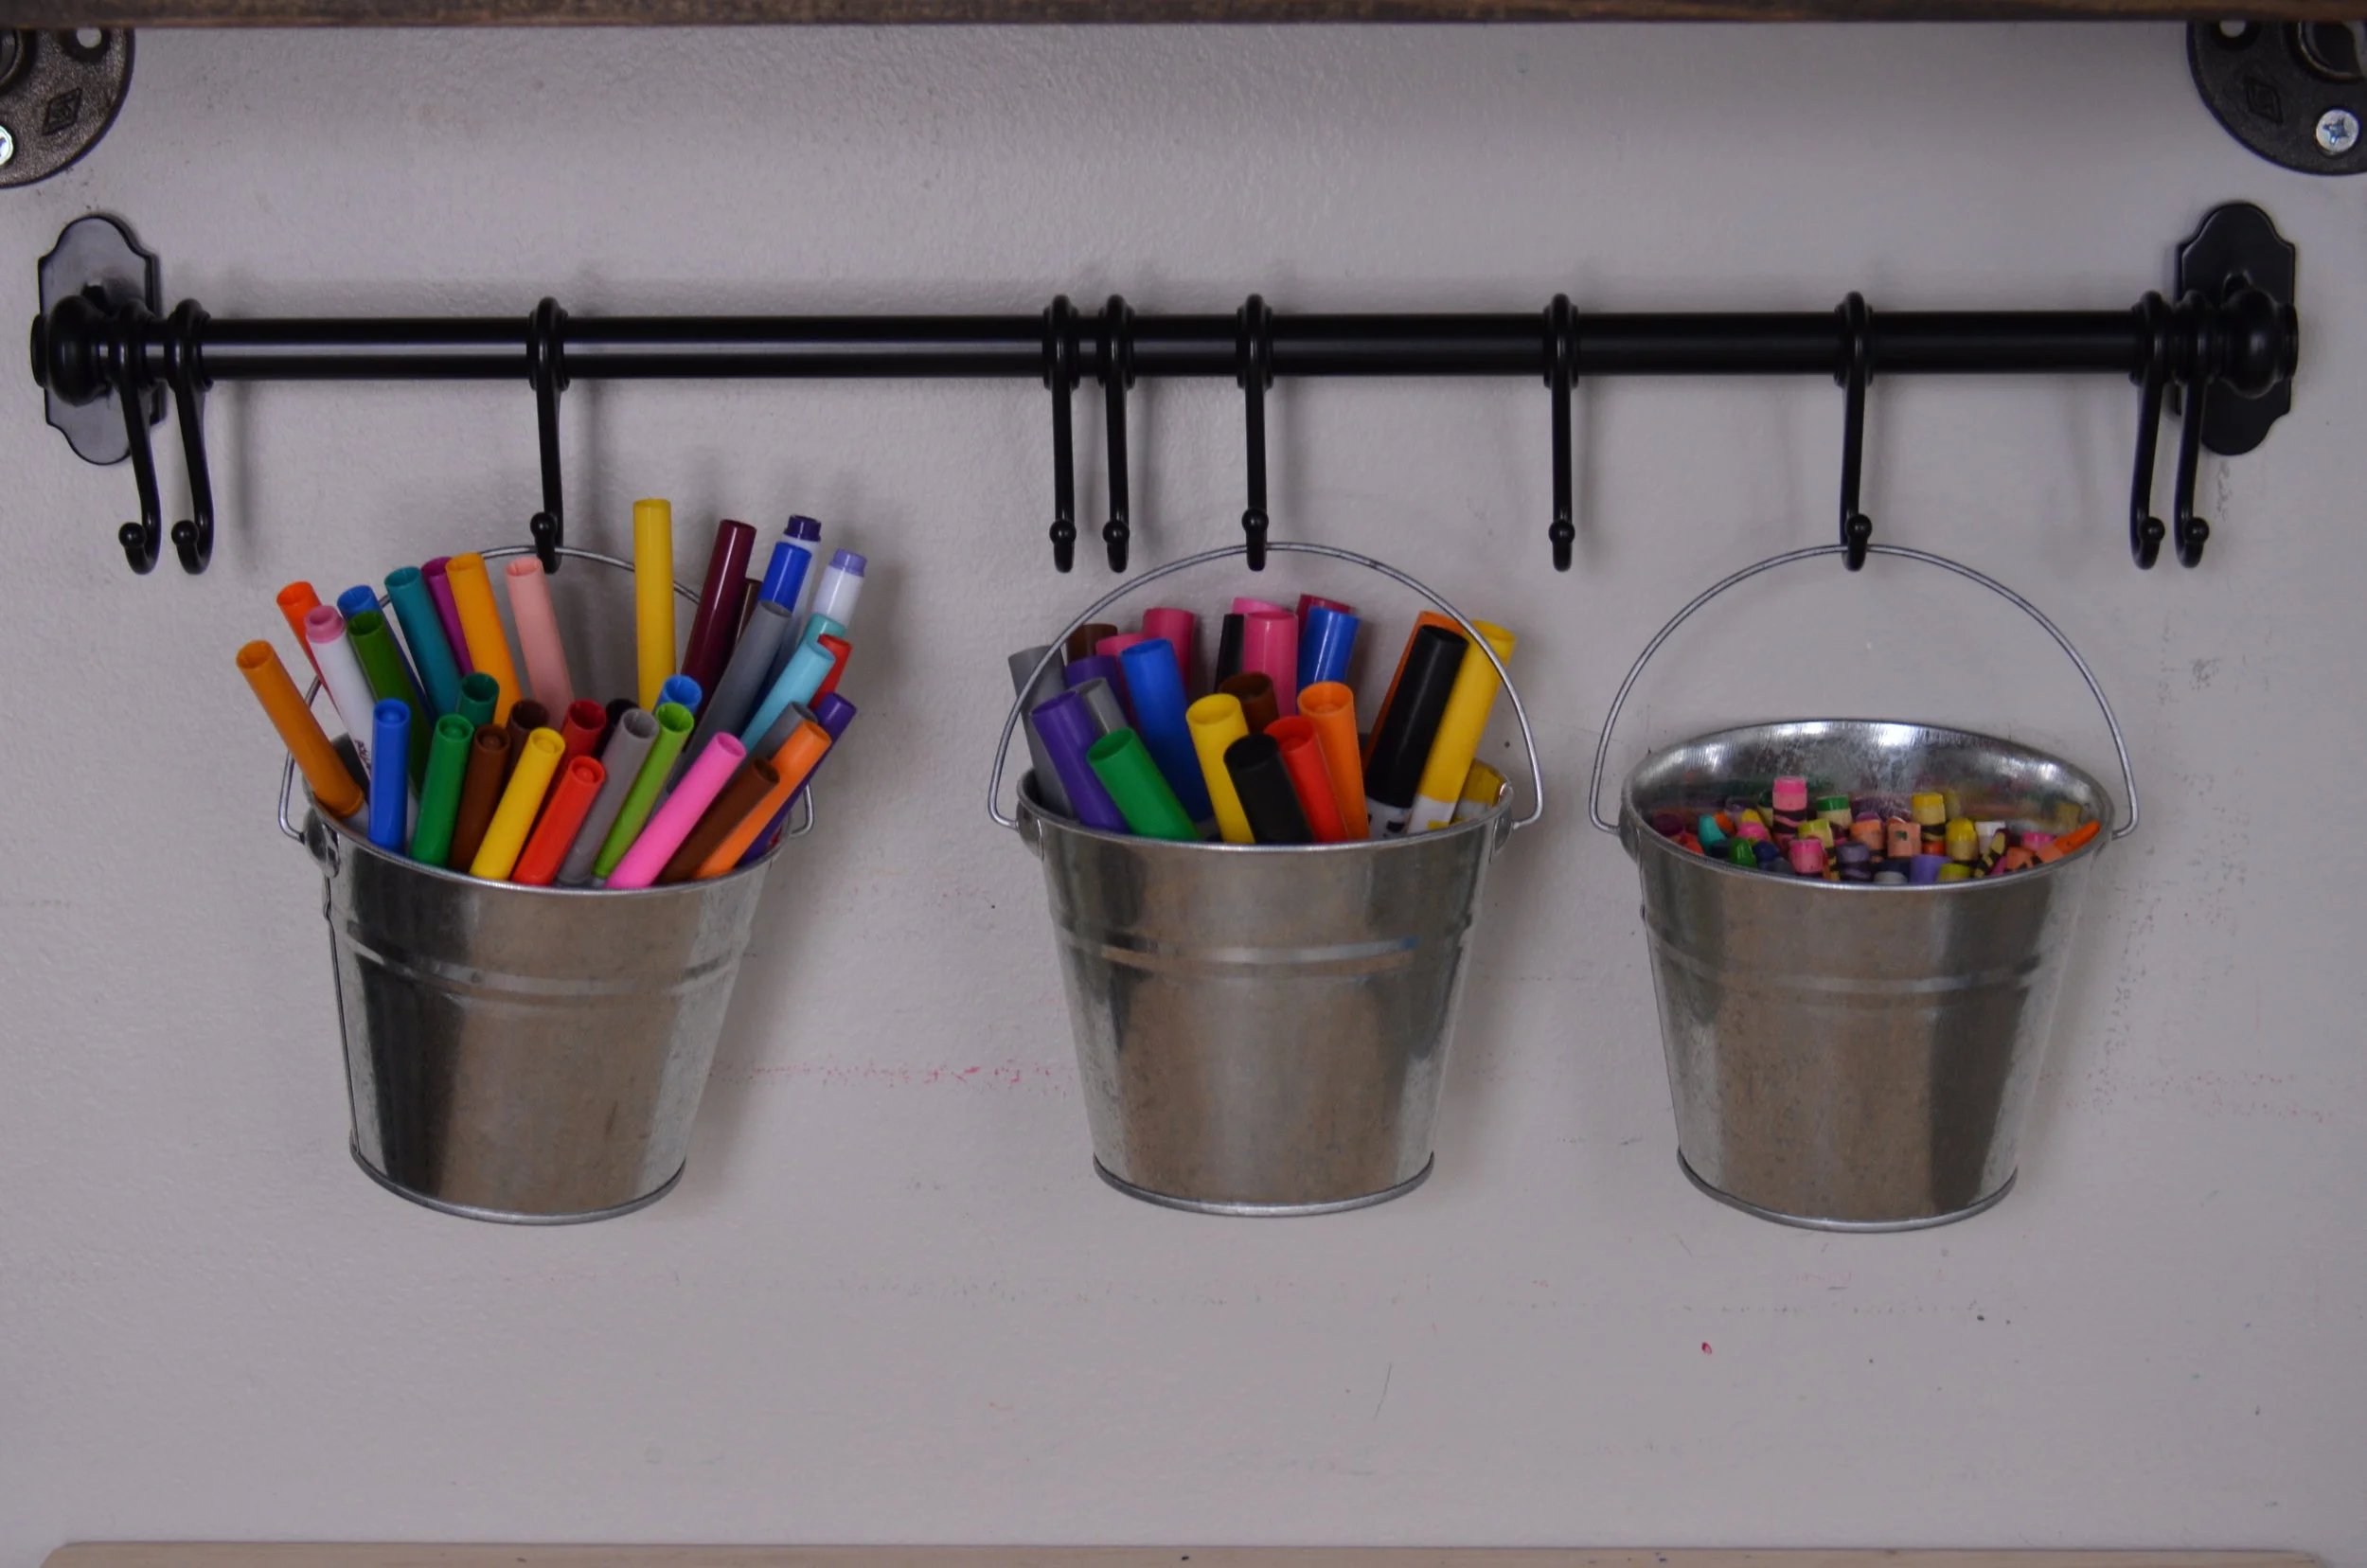
I also wanted things to be easily accessible for the kids. Moving the supplies up and off the table made it easer for them to access the items inside it. But I didn't want to move them so far that they would be out of the reach of my four-year-old. We chose to mount the shelf far enough above the table to have room to hang the hooks below it, but still below the hight of the lightswitch so that things were easily within Theo's reach.

Finally, I wanted this space to work with the existing space. Because this area is the first thing you see when you walk in our front door, and because it is right next to my workspace, I wanted it to blend easily. I like things to be neat and tidy and well-put together. The industrial chairs and shelving, the galvanized buckets and jars all flow with the overall scheme in our house, so it makes this area kid-friendly without being a mess.

Some things we keep in this area all the time:
- crayons
- markers (fat & thin)
- colored pencils
- scissors
- glue (bottles & sticks)
- water color pencils
- palettes & brushes
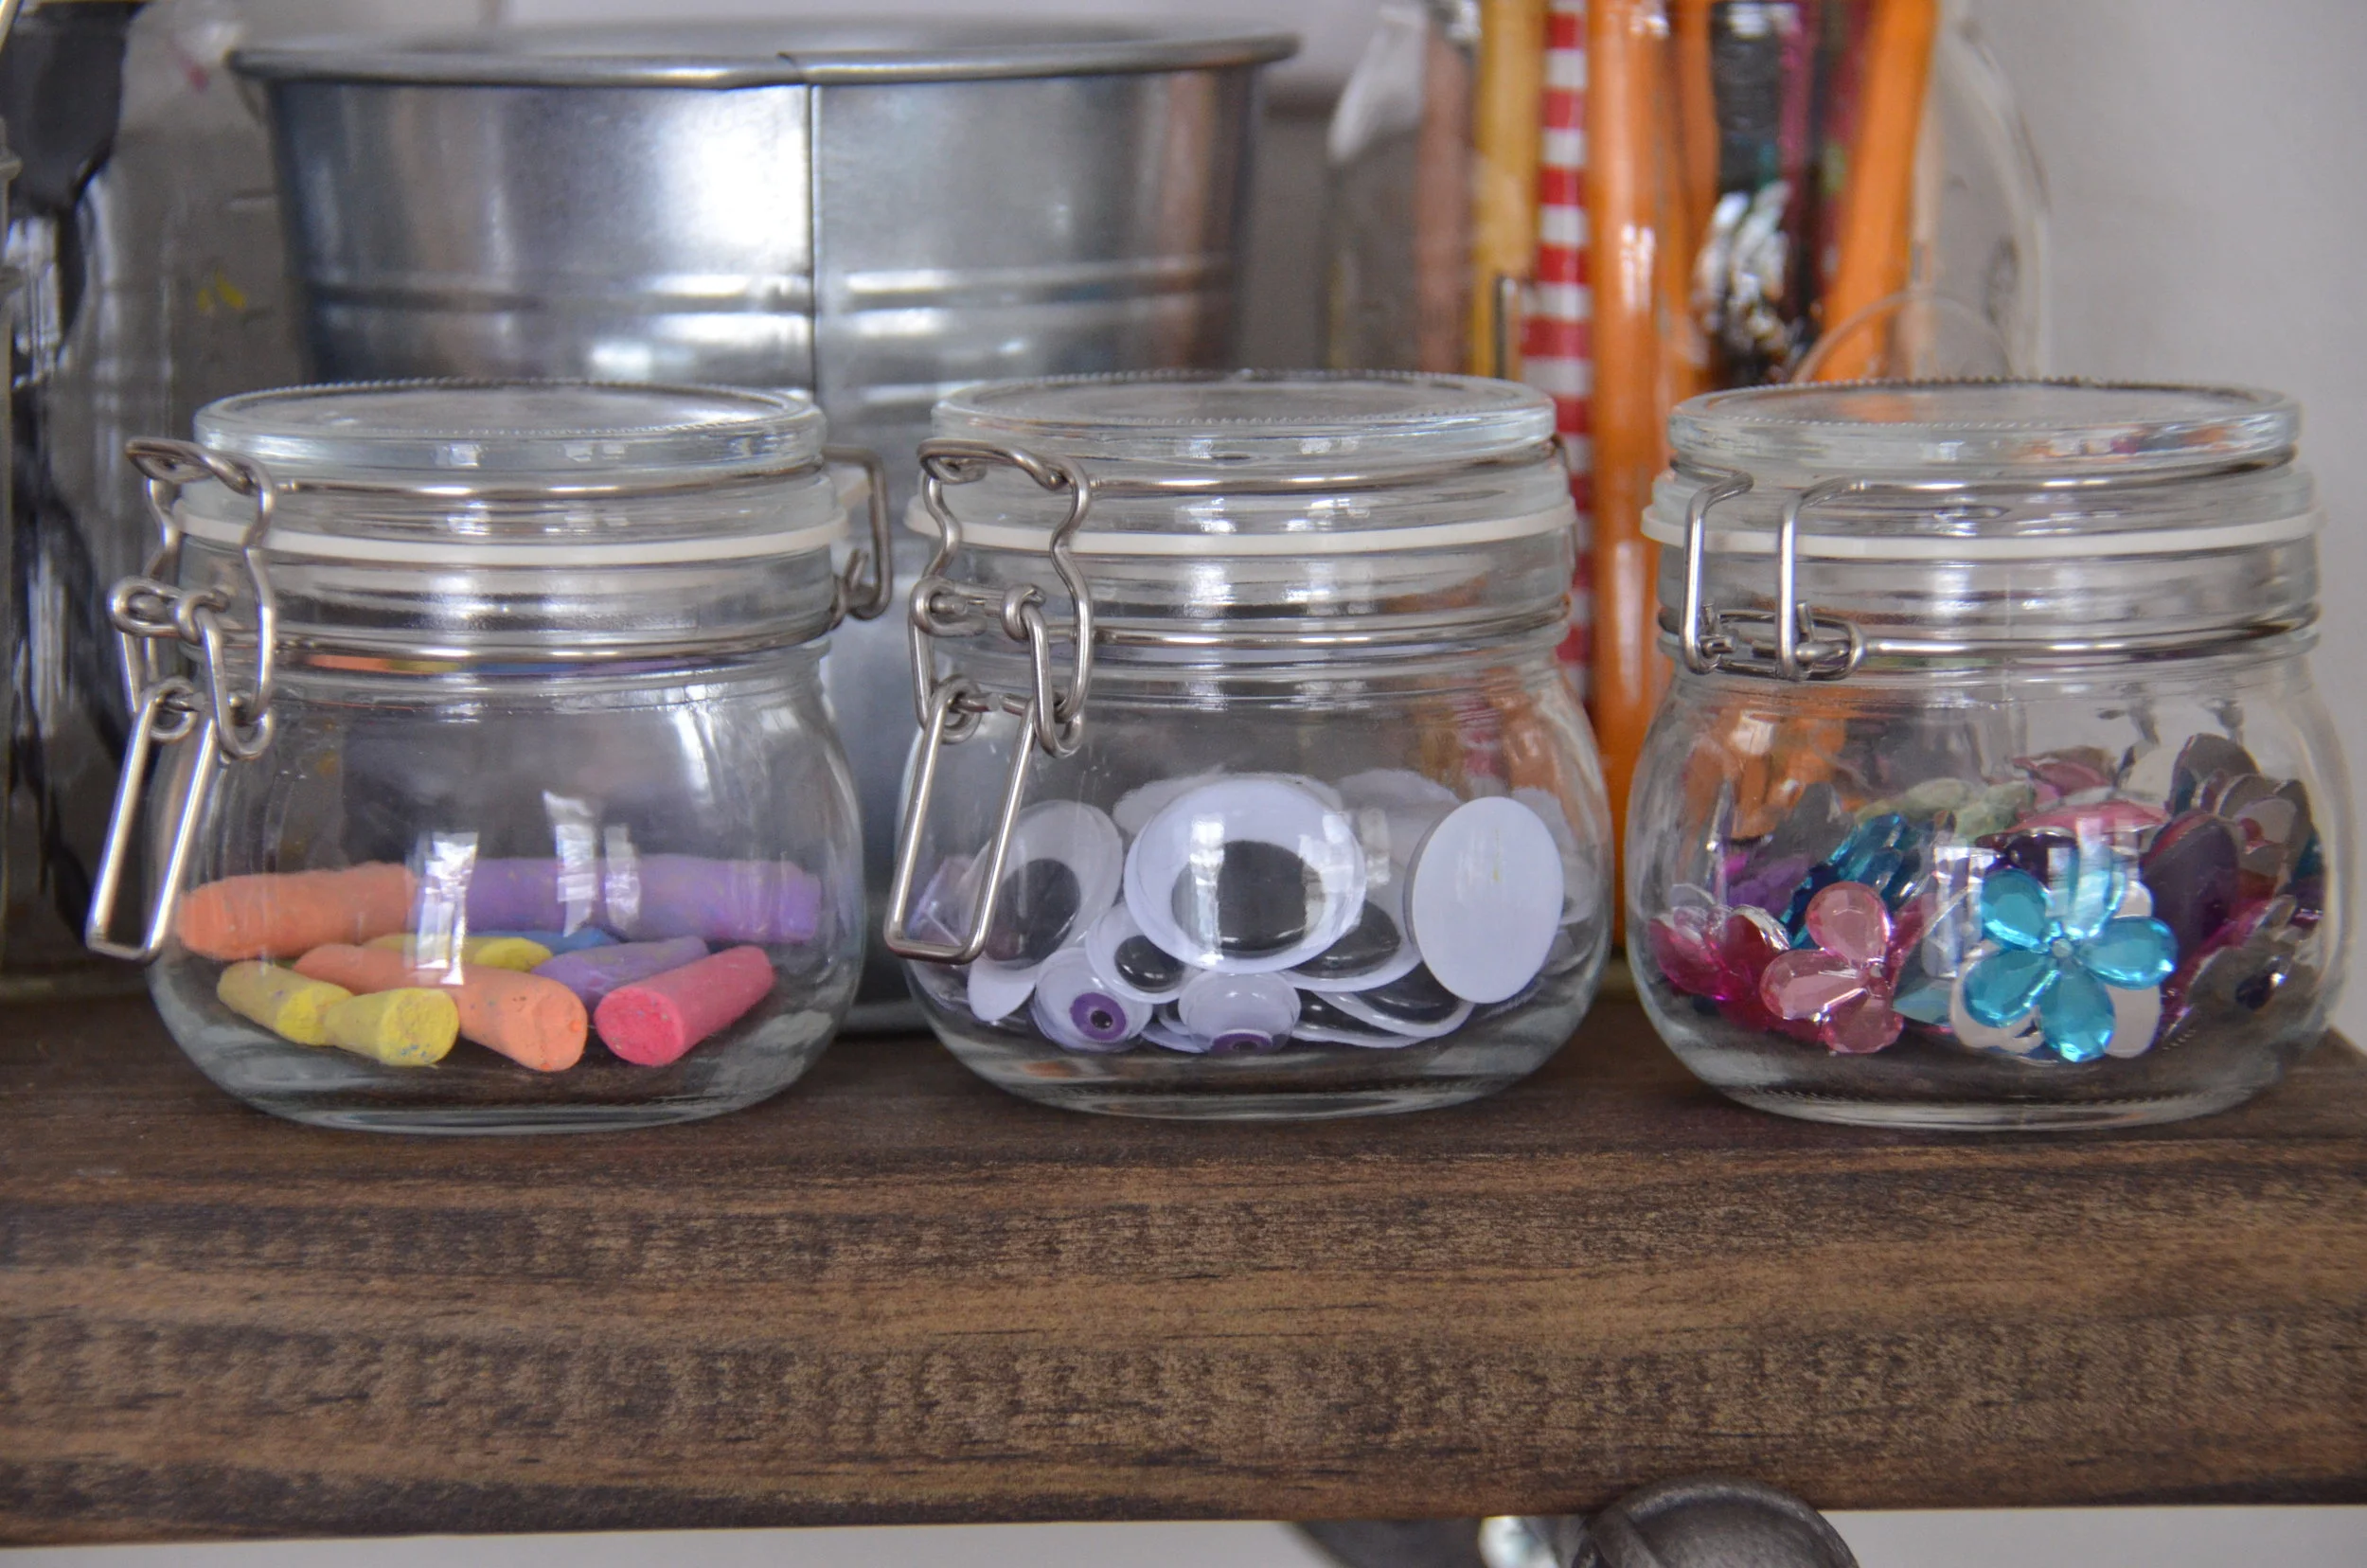
- chalk
- pencils
- writing paper
- construction paper
- coloring pages
- glitter
- gems
- googly eyes
My three younger kids, ages 4, 7, & 10, use this space every day and it functions well for all of them. Having a designated space to work helps to eliminate distractions (like the t.v., which is in our family room, close to our kitchen table) during homework time, and it's really nice to have everything they need right there. Of course, I still have to remind them to clean up and put things away, but having everything right and accessible makes it much easier.