"Boo" Bubbles

There are many things that I do not excel at as a parent. That’s really true of life in general; everyone has things they are really good at and other things they don’t do so well. For example, I am really bad at pretending. Even as a child, I didn’t love playing with dolls and stuffed animals, or making my Barbies talk to each other. And to this day, I really don’t like getting down on the floor and playing those types of things with my kids. I used to think that not wanting to play with my kids made me a bad parent and that my children would seriously lack imagination if I didn’t play with them, but it actually doesn’t mean either of those things are true. Solo play is an important part of developing creative thinking, problem solving and attention span. To be fair, I love spending time with my kids, just not doing that. And I find that I make much more meaningful connections with them when we are all actively engaged in whatever it is we are doing. So, when it comes to certain types of pretend play, my kids are on their own and we find other activities that we enjoy doing together: reading books, playing board games, taking bike rides…

…doing science experiments. I don’t know if it’s that we all just love science, or that they love it because I do; either way we’re here for a good science experiment. And making these “boo bubbles” from Steve Spangler Science was a good one.

Boo bubbles are bubbles that you can hold, bounce, toss and stack. We made them using dry ice, water and a simple bubble solution. Before I get into the details, let me tell you what dry ice is and give some safety tips for working with it.

Dry ice is created by quickly deep-freezing carbon dioxide. In order to keep it frozen, it must be held at sub-zero temperatures, typically around -110 degrees. Because it is so cold, it is unsafe to touch dry ice with your bare skin; doing so can result in severe burns. ALWAYS wear gloves when handling dry ice. Since dry ice is not made from water, it does not melt. That is, as it warms up, it does not become a liquid. Rather, it reverts to its gaseous form- a process called sublimation (if you look at the jar in the photo above, you can see water in the bottom with bubbles and vapor at the top; the bubbles and vapor are the carbon dioxide formed when dry ice sublimates).

Before we made our bubbles, we talked about the process of sublimation. To observe the difference, we put a piece of dry ice on one plate and a piece of regular ice on another plate and let them sit out while we prepared our experiment. To make our bubble “machine”, we used an empty 1-gallon plastic jar with its lid, some 1/2” clear vinyl tubing, a 1/2” barb x 1/2” adapter fitting, a PVC female adapter, and some plumber’s tape. In the top half of the jar, I cut a hole large enough for the threaded end of the adapter fitting. I wrapped the threaded end with some plumber’s tape and inserted it in the hole, then screwed the female adapter on from inside the jar to hold it in place. I cut a length of the clear tubing- about 4 feet or so- and attached it over the barbed end of the fitting. Then we added a small amount of warm water to the bottom of the jar and created our bubble solution using dish soap and water.

(If you didn’t want to make your own set-up, you could purchase the Boo Bubbles- Dry Ice Smoke Bubbles Experiment kit from Steve Spangler Science.)

When our materials were ready, we went back and looked at the plates. The plate that originally held a piece of regular ice had a small puddle of water. The plate with the dry ice was dry (as an interesting side note, when we set the dry ice on the plate, we could actually hear the process of sublimation happening; when it came in contact with the warm glass of the plate, the dry ice began to vibrate- a result of the extreme temperature difference). Then we dropped some dry ice in the jar, replaced the lid, dipped the free end our tubing in the bubble solution, and watched the magic happen.

The force of the gas exiting the jar through the tubing causes the bubbles to form, and because the vapor is trapped inside the bubble solution, they appear to be filled with smoke. You can drop the bubbles onto a towel-covered surface, where they will sit until the gas dissipates. They are safe to touch bare-handed, however, the oil on our skin causes them to pop, so if you would like to hold the bubbles, you’ll need to wear some cotton gloves. They can be bounced and tossed gently, and even handed from one person to another if passed off carefully.

Playing around and experimenting with these bubbles kept us occupied for a long time. Since the dry ice I bought came in pellet form- pieces about the size of a regular ice cube- it sublimated more quickly than a large chunk and we found that as that happened, the pressure of the gas exiting the jar dropped enough that bubbles would no longer form. Every so often, we just added a few more pellets to the jar. We also found that the temperature of the water in the jar affected the rate at which the ice sublimated and, therefore, the pressure, so we did add more warm water a few times and emptied it and added new water once it got too full (you don’t want the water to get too high or the gas will kid of hang out in the jar above the exit point). We had the most fun making piles of bubbles on the table and also forming a bubble within another bubble. It was also really neat to see how the gas would briefly linger in our hands in the shape of a bubble that popped early.

Mini Dinosaur Excavation Valentines

Small confession: I don’t love kids’ Valentine’s Day cards. This is not a slight against them, or anyone who buys them, they’re just not really my thing. And I have a hard time deciding what to do with them. Most of the time, my kids want to hold on to them, so we do, but I inevitably find them randomly stuffed in a piece of furniture or caught at the bottom of a storage basket or behind a dresser years after they get them. The other option is tossing them in the trash, which also, somehow, seems to lead to them turning up years down the road in the weirdest places. So-o-o-o… for the last several years we have made valentines together and tried to include something useful or a fun activity, instead. This year, Theo and I made some mini dinosaur excavation kits to give to his friends.

Even though this was technically a two-day project (hello, dry time) they were surprisingly quick and easy to make. And since, like, one person asked me how I made them, I decided I’d share them with the world.

I ordered the dinosaur skeletons and heart paperclips online, then picked up a silicone soap mold, plaster of Paris, and craft sticks from the craft store, cuticle sticks from Target and three 5-packs of paint brushes (which just happened to be red) from Dollar Tree.

I didn’t want to spend money on more than one mold, which made 6 at a time, so we had to make these in rounds. I used the recommended ratios for mixing the plaster of Paris (one part water to two parts plaster). Since it dries quickly, I mixed new plaster each time we filled the molds. For each round, I used 1.5 cups cold water with 3 cups plaster (I just used a glass mixing bowl and a large metal spoon so it would wash out/off easily), which gave me enough or a tiny bit extra each time. I poured enough plaster into the molds to fill each one about half-way, then Theo helped me tap it on the table a few times to release bubbles. He stuck the dinosaur skeletons in and I topped them off with plaster. The plaster sets for removal in an hour; when the hour was up, we popped them out of the molds and set them on a cooling rack to dry overnight.

I made up the tags, printed and cut them, and had Theo sign the backs. Once the blocks were all dry, I used red and white baker’s twine to tie everything up in a package and we attached the tags with the heart paperclips.

Printable 30-Day LEGO Challenge

My kids recently discovered the LEGO Masters show- have you seen it? Teams of two people are given an unlimited supply of LEGOs and a series of challenges; the winning team gets money, a trophy, and a title. We have quite the LEGO collection around here and even though it already got a lot of use, since they watched the show they’ve started asking me to give them challenges. So, I sat down with our LEGO Ideas Book and used it to help me come up with a list of 30 building challenges for them.

And since we’re all looking for ALL. THE. WAYS. to fight boredom these days, I thought I’d share it here with you.  But first, a quick tip:

We use twin-size fitted sheet to keep LEGO bricks from going everywhere while the kids are using them. And then when they’re done, we can pick up the sheet and dump the bricks right back into their bin.

Click the button below to download the printable PDF. Happy building!

Ice Cream Playdough

Happy summer, friends! It’s the first official day of the season, and you know what that means? ICE CREAM! ALLLLL the ice cream. To be perfectly honest, I can eat- and love- ice cream any time of year, even in the dead of winter, but, really, what is summer without it?

My kids love ice cream just as much as I do, so I decided to add “ice cream” to the list of foods available in our little playroom market. We already had some scoops, sundae cups, and this topping set, so I made two tubs of this ice cream dough (vanilla & chocolate) and added some ceramic “cones”- actually little sundae cups from the Target dollar area (since my kids are a little older, I’m ok with letting them use these ceramic cups for play, but they are breakable, so you could also use paper cones or even real ice cream cones).

Here’s what I love about this playdough: it looks, smells, and ACTS like real ice cream, and it’s taste-safe. Since it’s made out of canned frosting and powdered sugar, it’s perfectly safe if someone acidentally (or accidentally-on purpose) gets a taste of it. The flavoring in the frosting makes it smell just like ice cream. And it scoops perfectly.

To make this “ice cream” you’ll need one 16-oz can of store-bought frosting and about 3-1/2 cups of powdered sugar per flavor. Empty your can of frosting into a bowl and start adding your powdered sugar, mixing as you go. When it gets too hard to mix with a spoon or spatula, knead it with your hands until it no longer sticks to you and reaches the right consistency. You’ll know it’s right because you’ll be able to scoop it just like ice cream. If you accidentally add too much powdered sugar, you can add some cocnut oil or vegetable shortening in small amounts until you’ve softened the dough enough.

Store your playdough in the fridge when not in use (you’ll need to let it soften a little before playing). Remember that this dough IS perishable, so always check for signs of mold before using!

Simple Acts of Kindness for Kids- Free Printable

It’s December 1st, you guys, and we are starting our Advent calendar today! Several years ago, I bought an Advent calendar for the kids. I used to fill it with candy and small treats, but for the last few years, I have been putting simple acts of kindness in it, too. The kids (even Hunter) take turns opening the doors every morning and then they all complete the task in each section. Some of them are things they can do on their own (like holding the door for others and giving honest compliments) and some of them we do as a family (like making “blessing bags” to keep in our car for those in need).

I put together a quick printable with all of our Acts of Kindness for this season and I thought I would share it with you today, in case you would like to do them, too.

If you don’t have an Advent calendar, you could put the squares in a jar or container and draw one to complete each day, play Kindness Bingo, or simply cross one off each day! Or check out one of these Advent calendars here, here, or here! Just click here to download your free printable. I hope you’ll follow along with us!

Baking Soda Sensory Snow

A couple of days ago, we had approximately half an inch of snow accumulated on our deck and Theo was determined that we should go outside and build a snowman. Since there was most definitely not enough snow for that, we decided to make some snow “dough” to play with instead.

I found this recipe for baking soda snow and we set about making our own version of it. We’re at the point where I buy giant bags of baking soda to keep on hand for sensory play, so I hauled out my big old 12-lb. bag. We used 12 cups of baking soda to make this big bin of sensory snow.

After mixing it all up, he pulled out the Arctic animals we have in our stash of sensory bin toys. While he was playing with those guys in the snow, I rounded up a little tinker tray of things he could use to make a snowman. I filled the sections of a muffin tin with flannel strips, cinnamon sticks, black beans, pebbles, a bunch of wood pieces (small dowels, wood buttons, etc.), and some bottlebrush trees.

I didn’t bother freezing the snow after we mixed it, but it still felt almost exactly like real snow. It was cool and soft and packable. The only thing we found was that we weren’t able to give our snowman any arms, because sticking the dowels into our snow balls would make them crumble every time. In retrospect, freezing it for a little while probably would have helped hold it together better so our man could have his arms. Or maybe we needed to add a little more water. Either way, we still got a pretty cute snowman!

Two days later, the real snow outside is melting and by tomorrow it will be 50 degrees and seem like we never had any at all, but our inside snow is still going strong. We made it in a bin that no longer has a lid, so it hasn’t been getting covered up when we aren’t playing in it. And even though the top gets a little dry and crusty over night, all we have to do it mix it back up and we have snow again. When we got into it this morning, Theo decided we should add the glitter that we first left out, so now it’s all sparkly, too.

7 Things You Can Do to Stop Your Kids From Fighting & Help Them Learn to Get Along

“Do your kids ever fight?” A mom friend asked me this question recently as we were loading up in the car and I kind of shrugged and laughed and told her, “Yeah, of course they do.” Here’s the deal: Yes, my kids are mostly well-behaved toward each other in public, and I’m really thankful for that, because they are good kids. But, also? Just because they are well behaved in public doesn’t mean that they never fight, because if I’m honest, OH MY GOD, YES, they fight. A LOT. Especially my girls. Sometimes they fight so much that I start to question my parenting skills. How can I make them get along??

The truth is, I can’t. My girls are two very different people. One is quiet and reserved, neat and organized; the other dramatic and messy and definitely not afraid to tell you how she feels. Loudly. And both are so stubborn (what can I say, they come by it honestly). To complicate things, they share a not-very-large bedroom in our not-very-large house, where even the smallest of us can be hard-put to find personal space.

Some day, probably years from now, I hope they’ll be good friends, but as they head into their tween and teen years, I suspect it’s going to get worse before it gets better. So in the meantime, here is what we do to help them work it out without fighting.

Acknowledge their differences: let them know that it’s okay that they don’t like the same things, or feel the same way about things. After all, the world would be a very boring place if we were all the exact same person.

Give them their own space: this can be really hard in our house because we have so many people in such a small space. But it can be done. For example, since Sophia is older, typically has more work/needs less assistance, and needs quiet to work, she gets first dibs on the desk in their room during homework time. It takes some thought and creativity, but we do our best to give them spaces where they can have alone time if necessary.

Address their arguing calmly (model the behavior you want to see): sometimes, I really just want to scream at them to STOP.THE.FREAKING.ARGUING.ALREADY!, but that is a) totally not productive and b) a really poor example of how to deal with anger and frustration. That’s not to say that I never get angry, frustrated & fed up, nor should it imply that I never yell at them- because I do. But I try very hard to stay calm and keep my frustration in check.

Don’t try to solve their problems for them: If I am always providing the solution for them, they will never work out how to solve their differences. I try to leave it up to them to work out a solution to whatever issue is bothering the two of them. If they can’t get to it on their own, I will offer a few different solutions to choose from, and leave it to them to work it out. They also know that they can ask for help (hopefully calmly, rather than screaming, yelling, or tattling) if they cannot reach a solution.

Set expectations for behavior: the thing is, it’s okay to disagree. It’s okay to dislike someone’s actions. It’s okay to have feelings. But this is important : what is NOT okay is to treat anyone with disrespect just because you don’t like something they said or did. We spend a lot of time in our house talking about appropriate reactions to other people’s behavior and how to ask adults for help in handling problems when you truly need it. My kids know that they are EXPECTED to be respectful of other people’s bodies, feelings, and space, even when they disagree with them. What this looks like for us : we don’t put our hands on other people’s bodies, regrdless of their words (it is important to note here that my kids are also allowed to defend themselves if they find themselves in a situation in which words are not working or they are threatened with bodily harm- but that’s a whole different discussion). We tell people how we feel instead of lashing out at them. Do my kids follow this perfectly all the time? No, of course not. They’re kids, they make mistakes. We ALL make mistakes, which leads me to the final, and posibly most important, point-

Enforce consequences: if there are no consequences for their negative behavior, there is not incentive for them to change it. When my kids behave in a way that is inappropriate, there are consequences for their actions. I try to make sure that consequences happen in a timely manner (not hours or days after an issue arises), are age- appropriate (Theo may have a time out while the others may get grounded or lose other privileges, etc.), are proportionate and relative to their actions (for example, if someone says something nasty to someone else, they might then have to do 3 nice things for them), and are meaningful (they have a definite impact on my kids). In our house we have a reward system that allows my kids to collect and save up marbles in a jar that add up to an opportunity to choose a special outing with mom or dad. When they do certain positive behaviors, they get marbles to add to their jars. If they do certain negative behaviors (like fighting with each other), they have an immediate consequence- currently, they have to hand over a book out of their personal collection if they treat each other with disrespect- and it is working pretty well.

Drink wine : I’m joking! But really, know that arguing and fighting are, to a certain extent, part of a healthy relationship. Obviously knock-down, drag-out physical fights are not okay, but nobody is perfect, and nobody gets along with everyone all the time.

DIY Lettered Pumpkin Tutorial

Happy October, you guys! For the last couple of days I’ve been seeing the quote from Anne of Green Gables- “I’m so glad I live in a world where there are Octobers”- just about EVERYWHERE, and it’s killing me, because right now, in Ohio, it feels more like early July than early October. Where is my fall weather?! I want cool air and sweaters and scarves and soup and coffee all day and pretty leaves, and pumpkins & apples, but all I’m getting is humidity, rain, and 80 degree days. I don’t think Mother Nature got the memo.

Despite the weather, I’m over here getting into all the fall activities, which includes, of course, decoratiing. I really love the hand-lettered pumpkins I’ve been seeing all over, so I decided to make some of my own, and I thought I’d share the process with you, in case you want one - or a few- too. Because, actually, they’re pretty simple to make, and they’re really cute. So let’s jump right it!

To make these pumpkins you need 3 (maybe 4) things:

  • A pumpkin (real or faux- you choose)

  • A pencil

  • A paint pen (I used an oil-based Sharpie paint pen)

  • Optional carbon paper (or chalk- I’ll explain)

First, decide on your word/phrase and sketch it onto your pumpkin in pencil. Be sure to space your letters a little further apart than you normally would- and if you’re writing in cursive, leave extra space in your loops- because we’re going to create some faux calligraphy. If you’re unsure about lettering by hand, find a font you like on your computer and print your word/phrase. Then you can either use carbon paper OR cover the back of the printed page with chalk. Lay it against your pumpkin and use the pencil to trace around the outer edge of your printed word/phrase.

Next, use your paint pen to trace over your sketched lines. Be sure to shake your paint pen well before using and apply steady pressure while writing with it.

Finally, thicken some of your lines by tracing over them a couple more times with the pain pen. If you’ve traced a printed font, just fill in the wider spaces. If you did it free-hand, choose which lines you want to thicken. For faux-calligraphy, i.e. any script lettering, you’re going to make your down-strokes thicker. If you did a hand-printed font, you can get different looks by thinckening different lines. I chose to widen the left-hand side of every letter (also the down-strokes in this case) for my printed “HELLO”.

Let it dry for a few minutes and you’re done! Go find a cute place for it in your fall decor!

What I Should Have Said Instead: Advice For (New) Mamas

When I was in high school, I found a great group of friends. While I wasn’t “popular”, there were 7 or 8 of us who spent most of our teenager-y lives together: eating lunch, going to dances and football games and movies together, hanging out on the weekends, sleeping over at each other’s houses and just generally having each other’s backs. I didn’t realize it at the time, but looking back, I can see how lucky I was to have found my group.

And then, at the end of my junior year, I had a baby. My friends were still amazing and supportive and accepting of me, and we still hung out together often, but in many ways my life was miles apart from theirs, and when we graduated, we drifted apart. We were all going off to college, but I was sticking close to home and living with my mom so that I could raise a baby and go to school at the same time.

For the next 8 years, my close friends were limited. My sister has always been there for me, and of course I dated, and there were people at school and at work that I hung out with while we were there. BUT, they weren’t the types of close friendships I had in high school. Not because I didn’t want friends, but because I was always… separate from other people my age. Because my life was so different from other people my age- school, baby, work instead of school, partying, dating, work- I never really felt like I fit anywhere. By the time I graduated college 4 years later, I had met my husband, gotten married, had a 4 year-old, and was pregnant with my oldest daughter. Hunter started school, and I still didn’t fit- I was much younger than most of the other moms in his class, and I always felt awkward around them. 

But then-

When Sophia was 3, she started preschool. And once again, I found myself in the middle of this amazing group of women. I don’t know if we were friends because our kids were, or if our friends were kids because we were, but there we were. We spent our days together- having playdates with our kids, working out, going on outings, chatting, laughing, parenting our own children and each other’s and supporting each other through… everything.

Eight years later, we’re still friends. Our lives have changed. Some of us have moved away. We don’t see each other as often. But we still love each other, and every time we get together, we fall right back into each other’s lives exactly where we left off. And, although I've made some really great friends in this new season of my life, I cannot say that I have found a stronger connection than the one I had with these women.

If you’re still reading this, you’re probably wondering what my entire life’s story has to do with this blog post. If so, thanks for hanging in there with me, because I promise, I’m getting there!

Not long ago I was at a baby shower for a friend who is having her first baby, and one of the things the hostess asked the guests to do was write down some advice for the new parents. I'm always really bad at this, because even though there are always lots of things I want to say, I can never think of them in the moment. It's like my mind just goes blank, and I cannot think of a single useful thing that I have learned over the last 16 years of parenting. Which is crazy. Because here I am writing a blog all about my life with kids. Anyway. I can't remember exactly what I put on that card, except that I know I said something about making time to shower. Not bad advice, because you guys, showers are LIFE, especially when you're a new mama, or you have more than one kid, or any kids, really.

But, this weekend, as we closed down the pool on the final day of summer with those same friends we've been hanging with since preschool, I was reminded of possibly the MOST important piece of advice. And if I could write that card over again, I would write this (Shannon, I hope you're reading this, because it's my do-over!):

Look for your group. Your tribe. Your mama friends. I know you have some good ones in other states, but also, find them nearby. Motherhood, it can be lonely. Even with a boyfriend, a husband, a partner, a family there to help you. Because, honestly, no one is going to understand you better than other moms. No one- sorry, dads!- is going to be able to hear you quite like the other women who are walking similar paths through life. It can be hard, oh so hard, to find them. Making mom friends is crazy difficult sometimes, way harder than making friends when you're a kid. But be open. Don't be afraid to start a conversation with another mom you don't know in the middle of a park, a store, the preschool drop-off line. Because when you find them, you'll know, and it will be so WORTH IT. Also, one last thing- 55 Goldfish is roughly equal to 1/2 cup. Trust me, there will come a day when you will need to know this information.


Easy Painted Canvas Tote

This post contains affiliate links. If you make a purchase using one of these links, I may receive a small commission at no additional cost to you.

This summer I found some straw bags for the girls to embellish that I thought could double as a craft project and really cute beach bags for them (turns out the bags never actually made it to the beach, but that's another story). If I've got a project for the girls, I generally need something for Theo to do as well, so while they went about creating their bags, I did this painted canvas tote with him.

I bought him a simple white canvas tote from JoAnn Fabric, but I couldn't find it on their website, so you can click here for a similar one from Amazon (in a multi-pack, sorry!). He's really into dinosaurs right now, so I got online, found a silhouette of a stegosaurus that he liked, and printed it out on 8.5x11 inch paper. I made sure that it was big enough to fill most of the side of the bag (meaning it also filled most of the paper). I slid the paper into the bag and used a black Sharpie to trace the outline. I didn't get a picture of this part, but if you scroll down, you'll get the idea!

I could have given him fabric paint, but I don't keep much on hand, and I didn't want to buy a bunch of new paints. Watered-down acrylics work just as well, so I let Theo choose a few colors from my stash, then added a small about of water to each (you want them to be runny, like liquid paint, but not too watery). Don't forget to use a smock, because acrylics don't wash out one they are dry!

Before letting he got started, I slid a piece of parchment paper inside the bag so the paint would bleed through and make the sides stick together. Then I let him paint to his heart's content.

When he was satisfied with his work, I let his bag dry for a few hours (acrylics dry pretty quickly), then I took the parchment paper out and now he has a fun bag to take to the pool (or to the library, the store, or any where else he goes).

Chocolate Chip Cookie Ice Cream Sandwiches

Since July is National Ice Cream Month, and also since I haven't written a blog post in just about a month (this summer is flying by!), I thought I'd share these little bits of heaven with you today! They are, quite possibly, our favorite ice cream treat and SO, SO good. Go make some! You won't regret it!

The first time I ever had one of these, I was a teenager working in a pool concession stand for the summer and we sold the Nestle prepackaged ones. Seriously, I was like 15, and I had never in my life eaten an ice cream sandwich on chocolate chip cookies. They're a genius idea, because, hey, chocolate chip cookies and ice cream. Together. But, personally, I like more ice cream and fluffier cookies than the packaged ones. So, if you're like me and you love some chocolate chip cookies and ice cream, whip up a batch of these babies and keep them in your freezer to enjoy for the rest of the month. All you need are your favorite chocolate chip cookies (buy them, bake them, whatever) and a tub of vanilla ice cream- and some sprinkles if you want to get fancy. 

Soften your ice cream slightly by letting it sit out for a couple of minutes (don't let it sit too long or your sandwiches will get soggy). Put your bottom cookie top down on a piece of waxed paper, top with a scoop of ice cream and another cookie. If you're adding sprinkles. pour them out in a shallow bowl or tray and roll the edges of the sandwich in them. Wrap it up in the waxed paper and stick it in the freezer for an hour or two (or longer) so the ice cream gets firm again. And voila! Enjoy them with reckless abandon. Because they are the best.

DSC_9489.JPG

Can we just take a minute to enjoy his face, here? 

DIY Travel Games With Glitter Gems

For your convenience, this post contains affiliate links. I participate in the Amazon affiliate program; if you make a purchase using one of these links, I may receive a small commission, at no additional cost to you.

Sometimes you need small ways to entertain your kids. Waiting at a restaurant. During rest period at the pool (when they aren't raiding the entire pantry's worth of snacks that you brought along). In the car. ESPECIALLY in the car. I mean, there are only so many rounds of "I Spy" or the ABC spotting game you can play before everyone gets bored.

So, partly because my kids are always wanting to do a project, but mostly in anticipation of our 13-hour drive for vacation, I decided we should make these easy travel games with glitter gems.


These are nice because they're two games in one and they're small & contained, which makes them easy to toss in a bag or purse and pull them out when you need them. And, also, aren't those glitter stones pretty? To make them, we used:

I gave each of the kids 24 glass gems and let them pick two colors of glitter, which we poured into small paint palettes. The kids painted the bottom (flat side) of each gem with a thin layer of Mod Podge, then dipped them in the glitter, making 12 gems of each color.

You could also use E6000 glue, but since the kids were working with it, I was more comfortable using Mod Podge. We also used both chunky and fine glitter. Originally, I thought the chunky glitter would work best, but it turned out that the fine glitter covered the bottoms better. If you're using chunky glitter, be sure to push down on the gems so that they pick up enough glitter to cover the whole bottom.

After dipping the gems, we wiped off any excess that came up on the edges. With the chunky glitter, we had to push any pieces that were hanging past the edges back onto the base of the gem.

Lay them upside down on the table to dry. Mod Podge dries pretty quickly, but just to be sure (since the glue was completely covered by glitter ), we left ours to dry overnight. While the glue is drying, you can use fabric markers (or a Sharpie would work as well) to draw your game boards on your muslin bags. We put a 4x6 index card inside the bags before drawing on them so that the color would not bleed through to the other side of the bag. On one side, the kids each drew a tic-tac-toe grid.

On the other side, we drew a 4x5 grid to act as a Connect Four board. The girls did their own, but I had to help Theo with his; I just used an extra glass stone as a size guide for each box.

Once the glue under your glitter is dry, shake or brush off any excess glitter, then paint another thin layer of Mod Podge over the top to seal it all in. Let the second layer dry for a couple of hours and you're ready to play!

Note: to play Connect Four, the starting player must place his or her stone in the bottom row of the grid. Play continues as players take turns placing stones next to or above stones already in play to either block another player's move or attempt to get four of their own stones in a row (horizontally, vertically, or diagonally). First player to get four in a row wins.

How We Tackle Summer Learning Loss (No Workbooks Required)

This year, our elementary school offered families the opportunity to purchase workbooks intended to help prevent summer learning loss. The books were available from the same company that manufactures their regular school-year workbooks, so they would be consistent with the concepts the kids learned over the course of the year.

I didn't buy them.

I WON'T buy them.

Here's why. 

First of all, work books are boring (sorry, not sorry). Yes, they can be effective learning tools. Yes, they help kids practice concepts. But, let's be honest, there aren't too many people (child OR adult) who can truly, honestly say they ENJOY doing exercises in a workbook. Doing the same problems and answering the same questions over and over (and over) again isn't something I want to spend my own time doing, and I can't imagine that my kids really want to either.

Second, our kids spend SO MUCH time working during the school year. Not only is our school year long, but so are our days. Our kids are there for 6 1/2 hours during the day, and then they typically have homework every single evening- beginning in Kindergarten. On top of that, we have sports, extra-curricular activities (kids need to be well-rounded, you know), chores (have to teach them to be responsible!), AND we need to get enough sleep (kids should get between 10 and 12 hours of sleep per night to stay healthy). Don't get me wrong, ALL of these things are important. But even though we try to stick to one week-night activity per child, it can still be a lot, especially with a high-schooler. By the time the school year is over, we are ALL tired of being over-worked and over-scheduled, and we really just need the down time. Time to be together, time to relax, time to get outside and play.

Quite honestly, I am just tired of homework. I can't say it any other way. I don't remember having homework in Kindergarten- but my kids sure do. I don't remember having nearly as much homework as my kids do now when I was younger. And I certainly don't remember struggling so much to get it all finished. So, thanks, but no thanks on the summer busy work over here.

With all of that said, I still understand that summer learning loss is a real thing. And that practicing over the summer will help my kids be ready to jump in when school starts again in the fall. So. What do we do to prevent summer learning loss?

1. Read everyday. To quote my four-year-old, "Books make you smart." MY kids spend time reading at some point every day. Sometimes they read independently, sometimes they read to me, and sometimes I read to them.

2. Join a summer reading program. Most local libraries have summer reading programs that offer kids of all ages (and even adults!) incentives to read. Sometimes businesses offer them as well. These are fun for everyone, but especially helpful in encouraging kids who maybe don't enjoy reading as much as other things. Check out these four summer reading programs:

Barnes and Noble Summer Reading Program for Grades 1-6: Any child entering grades 1-6 who reads at least 8 books over the summer can earn a free book. Just print the reading journal, have your kids track their books (they're supposed to write down the title and their favorite part of each book), and take it to a local B&N store when it's complete. They'll each get to pick a free book from a list of selected titles.

Half-Price Books Feed Your Brain: Kids 14 & under who read for 300 minutes or more in June & July can redeem their reading log for Bookworm Bucks in August. Teens 15 & up can choose from a list of selected titles, read & write a short review which can be submitted online.

Chuck E. Cheese Reading Rewards: Download and print a Reading Rewards Calendar (or any of the other rewards calendars) and have your child track their reading every day for two weeks. Redeem at your local Chuck E. Cheese for 10 points/tokens. Be sure to check ahead of time and make sure your local restaurant participates. Also, note that, while each child can redeem up to one calendar per day, a food purchase is required.

Six Flags Read to Succeed: Any child enrolled in grades K-6 in a traditional or homeschool who completes 6 hours of non school-related reading is eligible for free admission to a Six Flags theme park. Create an online account to view rules & eligibility and track your child's reading.

You can search online for other local businesses that may offer reading programs (think movie theaters, restaurants, or other kid-friendly businesses), or create your own!

3. Play games. Board and card games are great for practicing everything from color recognition (hello, Candy Land!) to counting on to addition, subtraction, and money skills (Monopoly JR, anyone?!). Play Go Fish with regular playing cards to practice number recognition or print a couple copies of these sight word cards on cardstock and play with them instead. Or use the sight word cards to play Memory. Or play regular Memory. Or write math sentences on some cards and the answers on others and play a matching game that way. The possibilities are pretty limitless.

4. Cook & bake together. Cooking combines a lot of concepts. Reading a recipe, obviously. Following directions. Math skills like measuring, adding, and multiplying- especially if, like in our family, you have to double most recipes to make enough.

5. Get your kids involved with grocery shopping. Which, of course, goes right along with cooking together. Help your child make a list of the necessary ingredients and give them some money. Help them locate them items in the store, compare prices and buy their items while staying within their set budget.

6. Have a sale (or go to one). Lemonade stands, garage sales, etc., are great, low-cost opportunities for kids to learn about math and social studies concepts such as money, cost and profit, supply and demand, and more. They can purchase supplies (or determine which items they'd like to sell), set their costs, figure out their profit, add & subtract, and make change. Don't want to have a sale? Go to one instead. Find a local community garage sale, or even a dollar store and give your kids a small budget (maybe $5-$10). They can choose items they want to buy, learn about budgeting for items they truly want vs. making impulse buys, and calculate the amount of money they will have left once they've made a purchase. Help them figure out how much change they should get back from their purcahse before buying so that they can make sure they get the right amount. And if you go to a dollar store, don't forget to talk about sales tax!

7. Write! Give your child a journal to write and/or draw pictures in. Ask them to draw a picture and write a short story about it. Write & mail letters to friends, family, or even teachers, even if they live nearby (who doesn't love to get mail?!). Or, find a pen pal (check out Mr. Boddington's Studio for some cute stationary & try joining the Secret Society of Letter Writers). For littles, practice drawing pictures to help tell stories, name writing, sight words, and made-up spelling. Let older kids practice using a dictionary to look up words if they are unsure of spelling and talk about the difference between a friendly letter and a business letter.


Keep in mind that the best way to keep kids practicing is to make it fun! Getting them involved in things they enjoy that promote learning concepts will keep their brains engaged all summer long.

Painted Wood Bead Necklaces

A couple of weeks ago I was looking for a low-prep activity to do with the kids, so I dug out these left over 20-mm wood beads that I had from another project. I let them pick some acrylic paint colors from my stash, threw some smocks on them and let them go to town painting their beads.

When they were done painting them, I threaded them on toothpicks and laid the toothpicks across the mouths of some mason jars so the beads could dry. Acrylic paint dries pretty quickly, so it didn't take long.

Once the beads were dry, I sprayed them with sealant to keep the paint from chipping. Then I gave them their beads, some pony beads for spacers, and some nylon mousetail cord so they could string them onto necklaces.

When they were done, I tied the ends of the cord into a knot, then used a lighter to melt the cord slightly so the knot wouldn't come undone. 

Don't you just love those chunky wood beads? There's just something about them, especially in those cheerful colors, that I love!

Easy-Peasy End of Year Teacher's Gifts

Well, believe it or not, the end of the school year is almost here, and you guys, I COULD NOT POSSIBLY BE ANY HAPPIER about it. I think I may be the only parent on the planet who prays for the end of the school year to come quickly. Don't get me wrong, I love school. Come fall, I'll be all gung-ho for school supplies and uniforms and all the things (except homework- I hate homework- don't even get me STARTED about all the freaking HOMEWORK). But. I reach a point in every year when I am just done. Usually, it's right about spring break time when I start thinking that I would really just like to NOT have to send everyone back to school for another day. Honestly, if we could just start the school year after Labor Day and end it before Memorial Day, I would be perfectly happy with that.

Part of the problem is that there is just SO.MUCH.STUFF. crammed into the end of the school year. Field trips, events, awards ceremonies, sports, class projects.... a list as long as my arm of things that need to be done or attended. All on top of the regular school day-homework grind. So I always feel like I'm missing something, or I've forgotten something and there's almost always something that has been left until the last minute because I just couldn't find time to do it.

And that something is usually gifts for my kids' teachers. Those wonderful souls who spend all their days with my kids trying to help make them the best possible people they can DEFINITELY deserve a gift (actually, they deserve way more gifts than I give them, but that's a whole other post) and yet, somehow, I always find myself putting them together at 1 a.m. the night before the last day of school- or even ON the last day of school. But this year. THIS YEAR, I got them done early, and I am so proud of myself that I thought I'd share them with all of you, in case you need a cute idea.

Every year, I try to give the teachers something that is really just for them- not classroom or teaching related, per se- and usually something inspired by summer. And you just can't get any more summery than lemonade, right? It screams summer. It's the official drink of summer. And I love lemonade (hopefully these teachers do, too!). I found everything for these easy-peasy, lemon-squeezy gifts in the dollar spot at Target (possibly my favorite place in the entire world), and I love the way they went together!

Each gift includes:

  1. Lemonade pitcher ($5)
  2. Reusable plastic cups - they look like Solo cups, but they're sturdier ($3 for a set of 4)
  3. Wooden spoon ($1)
  4. Multi-colored reusable ice cubes ($1)
  5. Lemon-shaped reusable ice cubes ($1)
  6. Paper straws ($1 for 24)

I arranged all the items inside the pitcher, and then I added a cute gift tag made from a wood lemon cut-out ($1 for 4) and a little mason jar-shaped note card ($1 for 8). I punched a hole in the top of the notecard and added it on the twine already strung through the lemon cut outs. I wrote each teacher's name on the front, and on the back I wrote: "Thanks for making this year 'easy-peasy lemon-squeezy'". I had each child sign the tag for their teacher and then I tied them on and I was done.

I think I spent $12.50 per teacher (we have 3 teachers that we are giving gifts to) and they took me about 10 minutes to put together. I think I'll probably pick up some small succulents to give them as well, but I love these lemonade pitchers!

Easy "Stained Glass" Sun Catchers

When I was in high school, we had a service requirement to graduate. In my senior year, my best friend and I were volunteering together in a local nursing home, mainly on a floor with Alzheimer's and dementia patients. Up until that point, my interaction with people who needed constant care in that capacity was fairly limited- when I was VERY young we used to visit a second cousin who had cerebral palsy and some other conditions, and I had a great grandmother who suffered from Alzheimers- and I have to admit that it took me very far out of my comfort zone. I think I just had a hard time knowing how to act with the residents- these people so much older than me, but many of them needing to be cared for like children- so I struggled with it so much.

Which is why I think it's great that the fifth grade class at my kids' school spends some time during the school year visiting with the residents at a nursing home/assisted living facility nearby. The kids go 3-4 times over the course of the year to spend time with the residents, and it's really interesting to see the change in their approach to things as the year goes on. Usually on their first visit, most of the students are pretty quiet and unsure of where to go, but by the time they have their last vsit, they've gotten comfortable, both in the facility itself, and with the residents.

Usually, the class brings along some sort of craft or activity to do (so everyone's not just sitting around staring at each other) and they might have a snack or treat, play games, and sing together. And since I am the classroom parent for my daughter's class, her teacher asked me to help with crafts for the kids to do with the residents. This turned out to be harder than it sounds, because they had to be something that didn't take too long, was easy to transport to the facility, could be done by two or 3 people at the same time, and had to be fairly easy in terms of motor skills so that the residents could participate. Oh, and we wanted it to be something fun to display, because the residents would keep them.

My most favorite one was the one we did on their last visit, this spring. These sun catchers were easy for the kids and residents to do together (in most cases the kids handled the glue while the residents chose the color and placement of the tissue paper), and they look so bright and cheery hanging in the windows. The 5th graders really enjoyed makng them, and my 4 & 5 year-old testers had no problem doing them all by themselves, so they are gorgeous and great for any age! And you may already have most of the items at home, but if you don't, you can find all of them at the dollar store.

To make these stained glass suncatchers, you'll need:

Sun Catcher Supplies
  • Tissue paper in various colors (I just bought a package of 24 sheets in multiple colors)
  • Clear plastic plates
  • School glue
  • a small bowl
  • Foam brush of large-ish paint brush
  • Twine, yarn or ribbon
  • Hot glue gun

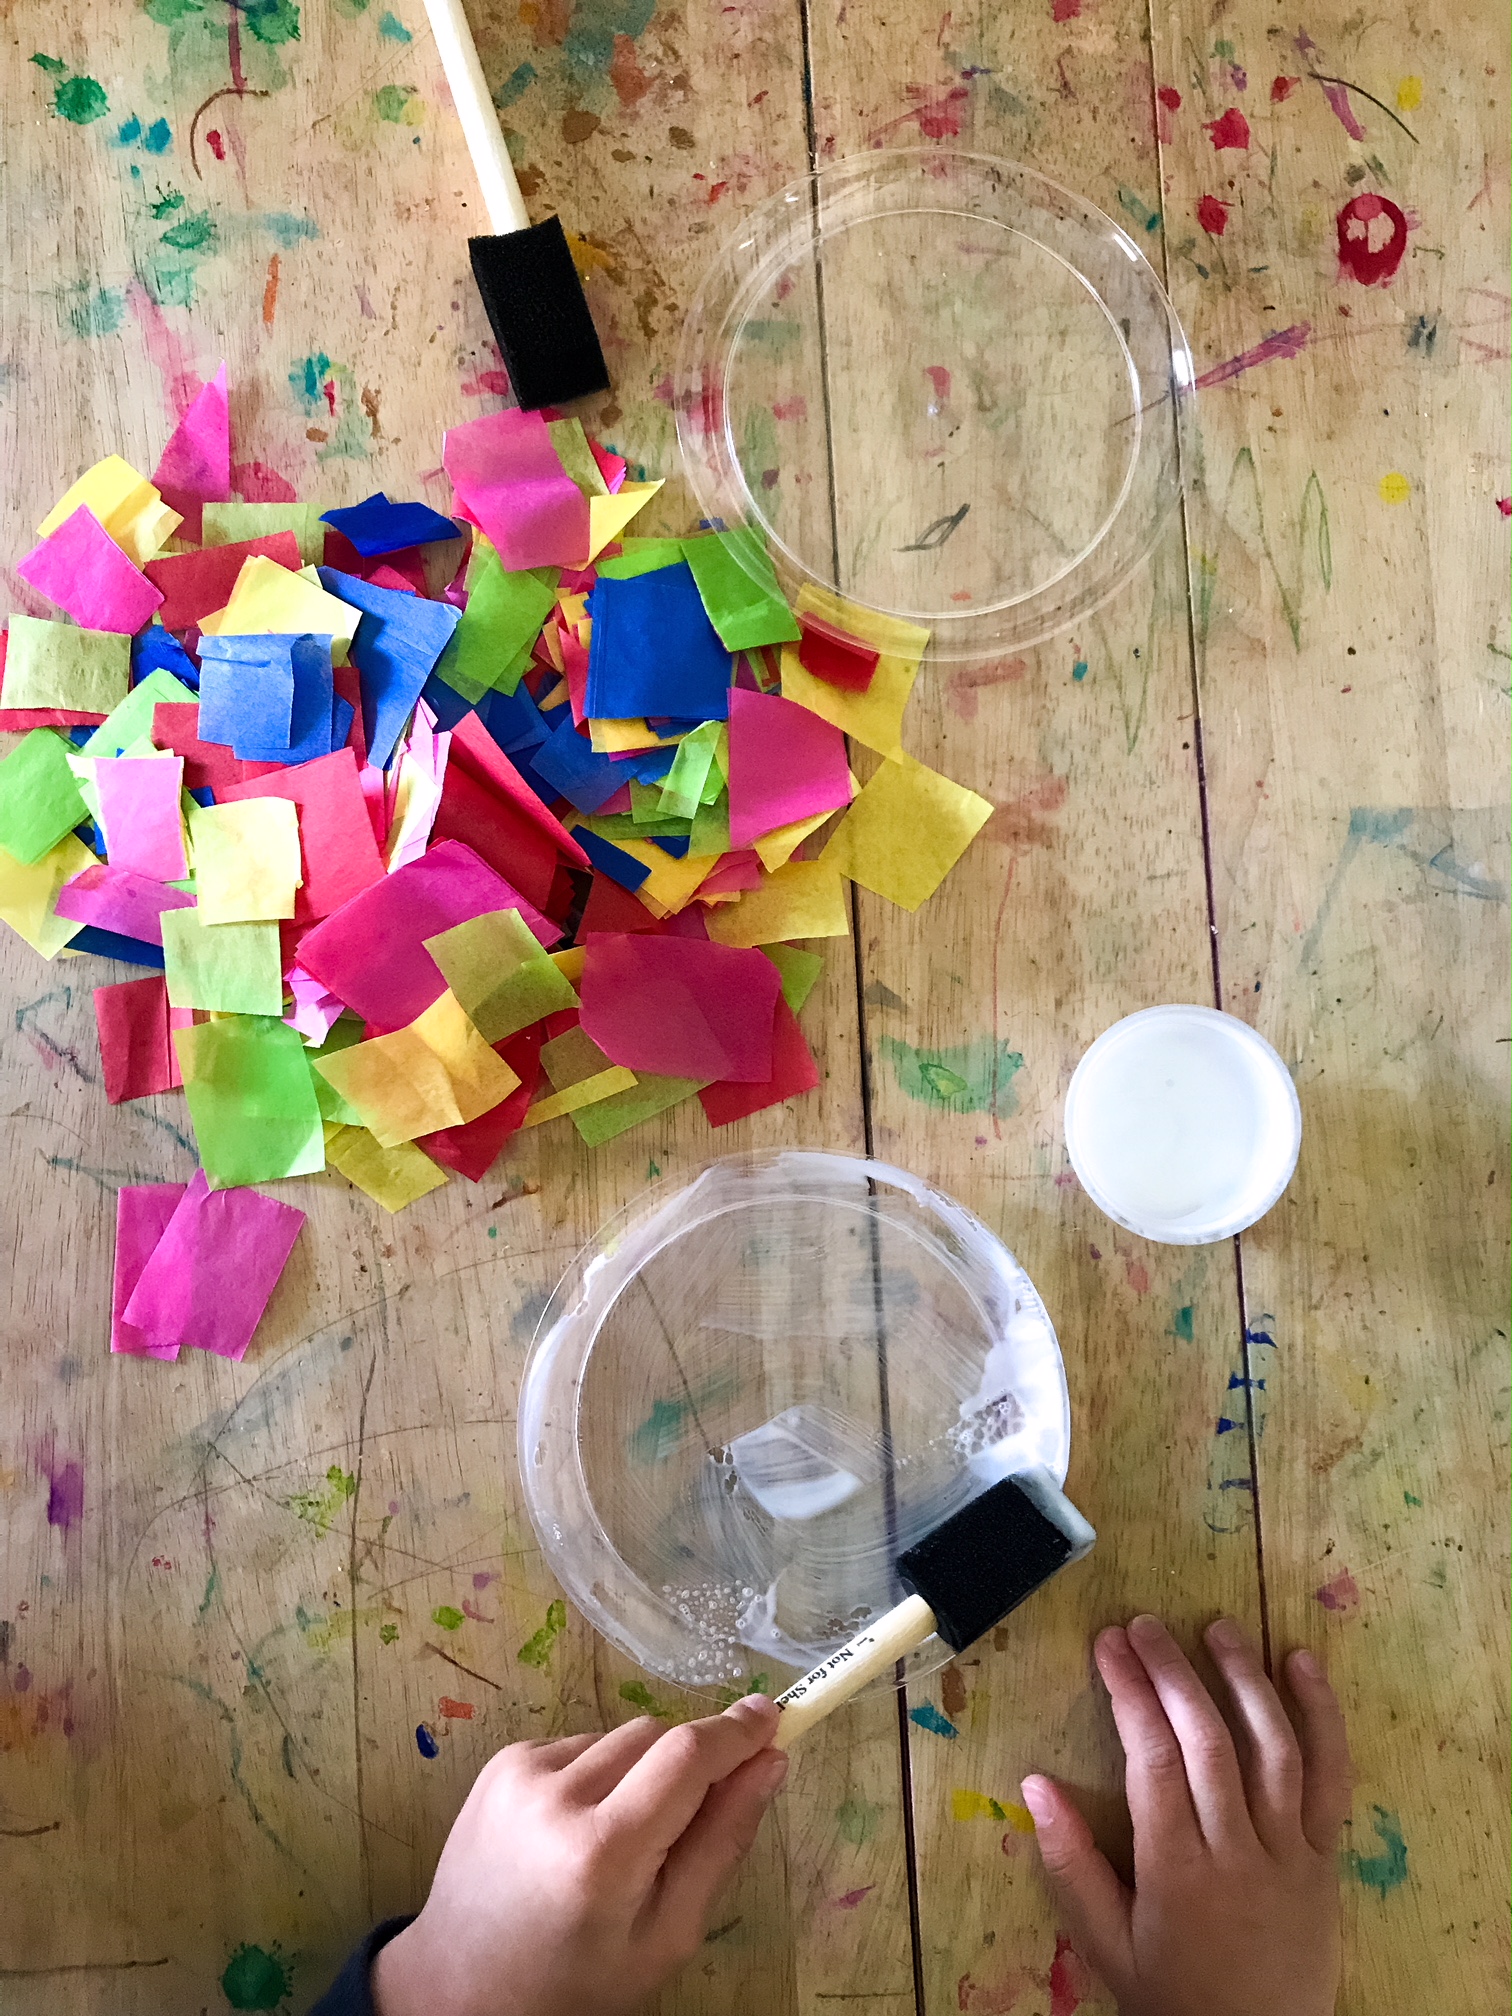
Pour some glue into your bowl. Working in sections, use the foam brush to paint glue on the top side of the plate.

Easy Stained Glass Sun Catchers

Lay pieces of tissue in a single layer on top of the glue. The pieces of tissue paper can overlap at the edges, but you want to avoid laying too many pieces on top of each other, so the sun can still filter through. 

Easy Stained Glass Sun Catchers

Gently paint a second layer of glue over the tissue paper, smoothing out any bumps or pieces hanging over the edge. Allow to dry. When the glue is dry, hot glue a loop of yarn, twine or ribbon to the back of the plate. Hang in a window that gets lots of sun.

Easy Stained Glass Sun Catchers

When I prepped everything to take to the nursing home, I pre-cut the tissue paper into squares and hot-glued loops of twine to the backs of the plates ahead of time, but you can let the kids do the cutting (or tear the tissue paper), and add your hanger whenever works for you.

On His 16th Birthday: Thoughts From a Teen Mom Who's All Grown Up

How did we get here? Sometimes, I'm not sure I even know.

On this day, 16 years ago, I was in a classroom at school, trying to sit calmly at my desk, listen to my Spanish teacher, and just make it to... I don't know what- the end of the day, maybe? When I finally came to the realization that I needed someone to help me, I went to the office, got them to call my mom so I could sign myself out for the day, and drove home. First I called my boyfriend, who met me there and left again, and then I called my parents at work to tell them that I needed to go to the hospital. I was 2 months shy of my 17th birthday, and I was having a baby.

I suspect that people's first reactions on reading this will be judgement. It is, after all, still the reaction I get most of the time when people find out that I am 32 years old and my oldest son is turning 16.

IMG_9173.JPG

"You have a 16-year-old?!"

"You don't look old enough to have a 16 year-old!"

"But, really, how old ARE you?!"

Most of the time, I play these comments off. I answer with, "Oh, well, thank you" or "Technically, I'm not" or simply, "Yes, I do". Any response that is far from what I'm really thinking, which is basically, "It's none of your f*ing business!". But sometimes they make me angry. Like the time (when he was about one) a parent of one of my swimming lesson students told me, "I hope you don't mind, but I used you as an example when I was talking to my kids about not having sex before they're married." Or the person who said to me a few weeks ago (regarding the fact that my son is currently attending high school at my alma mater), "You had a baby and they let you come back?". I can't even make these things up.

He was born on a Wednesday, and I was back at school by the following Monday. In those days and weeks after he was born, I had a lot of adult choices to make. He was born premature- weighing in at 2 lbs., 10 oz.; his head could fit in the palm of my hand- and had some complications with his diaphragm that needed to be corrected. A social worker visited me to discuss the possibility of adoption. I had a lot of support from my parents, but these decisions- about adoption and medical care and surgeries- were ultimately mine to make.

The choice to raise my child at 17 brought with it a whole lot of other choices and changes. Up until that time, I was the epitome of the "good girl". I followed all the rules, I got good grades, I was involved in sports and extra-cirriculars, I held a job, and I spent time volunteering. I didn't drink, smoke, or do drugs. And after he was born, I continued most of those things. I got good grades, I held a job, I volunteered when I could. I earned an academic full-ride to my university of choice.

But there were things that I chose to give up- sports and extra-cirriculars- to be able to take care of him. And there were opportunities that were no longer afforded to me that I might otherwise have had. I went to Catholic school, so even though I was allowed to walk at graduation, in my senior year I was not accepted into the National Honor Society, because some of the teachers on the panel felt that my decisions did not reflect the appropriate qualities of a member of NHS. When I went to college, instead of living on campus, I lived at home and commuted. And I didn't spend a lot of time going out or partying like other people my age.

Please understand, I'm not complaining. I know that all these things were a direct result of my choices, and this kid is totally, absolutely worth it, 100%. He is a great kid- kind and thoughtful, intelligent and caring and perceptive- but I'm never sure if he is that way because of my parenting or inspite of it. I look back and wonder if I did enough. Did I spend enough time with him when he was little? Did I treat him with respect? Did I make the right choices in regards to his relationships with others? And, am I doing enough, now, to continue giving him love, support, and boundaries?

I've worked hard to be a good mom, I think. There are things I haven't been able to give him- opportunities to explore interests, mostly- but I hope that what I have given him is a strong foundation and a knowledge that he is supported. I try to be honest with all of my kids about my choices at this age, and to let them know that I hope for something different for them. NOT because I think my life was bad, but because it was harder than necessary, and I would choose something different for them. And I think he, of all of them, is MOST able to recognize that, having witnessed the dynamic between me and his dad and him.

But still, this is a scary milestone for me. Because I know what it's like to be the good kid. And I know how easy it is to make a poor choice. And I know how much one choice can change things.

Invitation to Play: Dinosaur Habitats with Play Dough

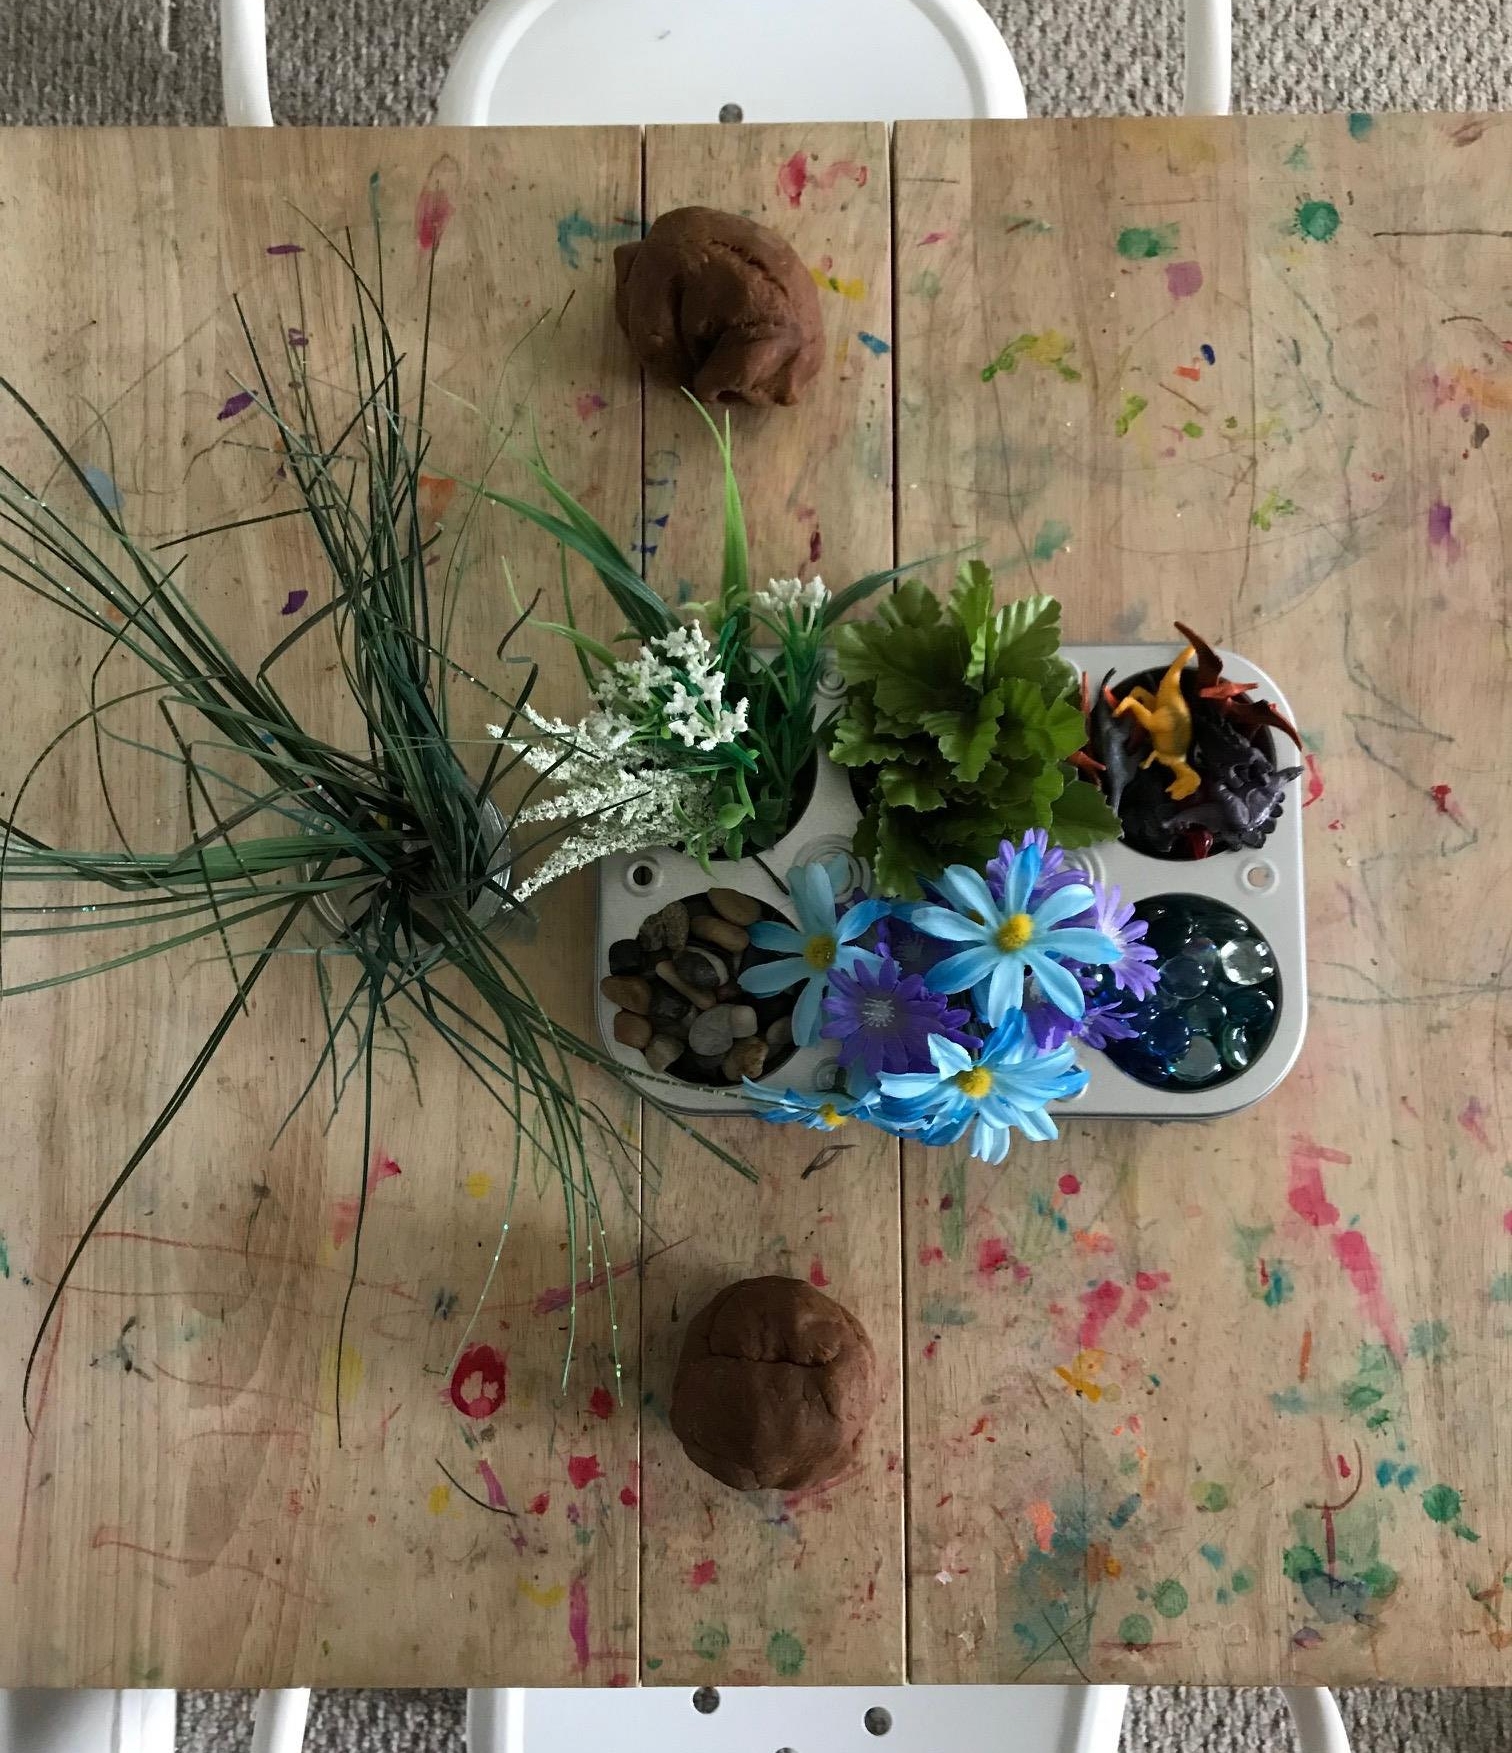
Current obsessions... ahem... interests among the preschool & kindergarten set in our house include sharks, dragons, and dinosaurs. We've done habitats at our house before (remember our unicorn habitats?), but because we glued everything down, they were kind of a one-time art project. THIS time, we're using brown play dough as our land, so that we can take them apart and re-make them over and over.

IMG_8819.jpg


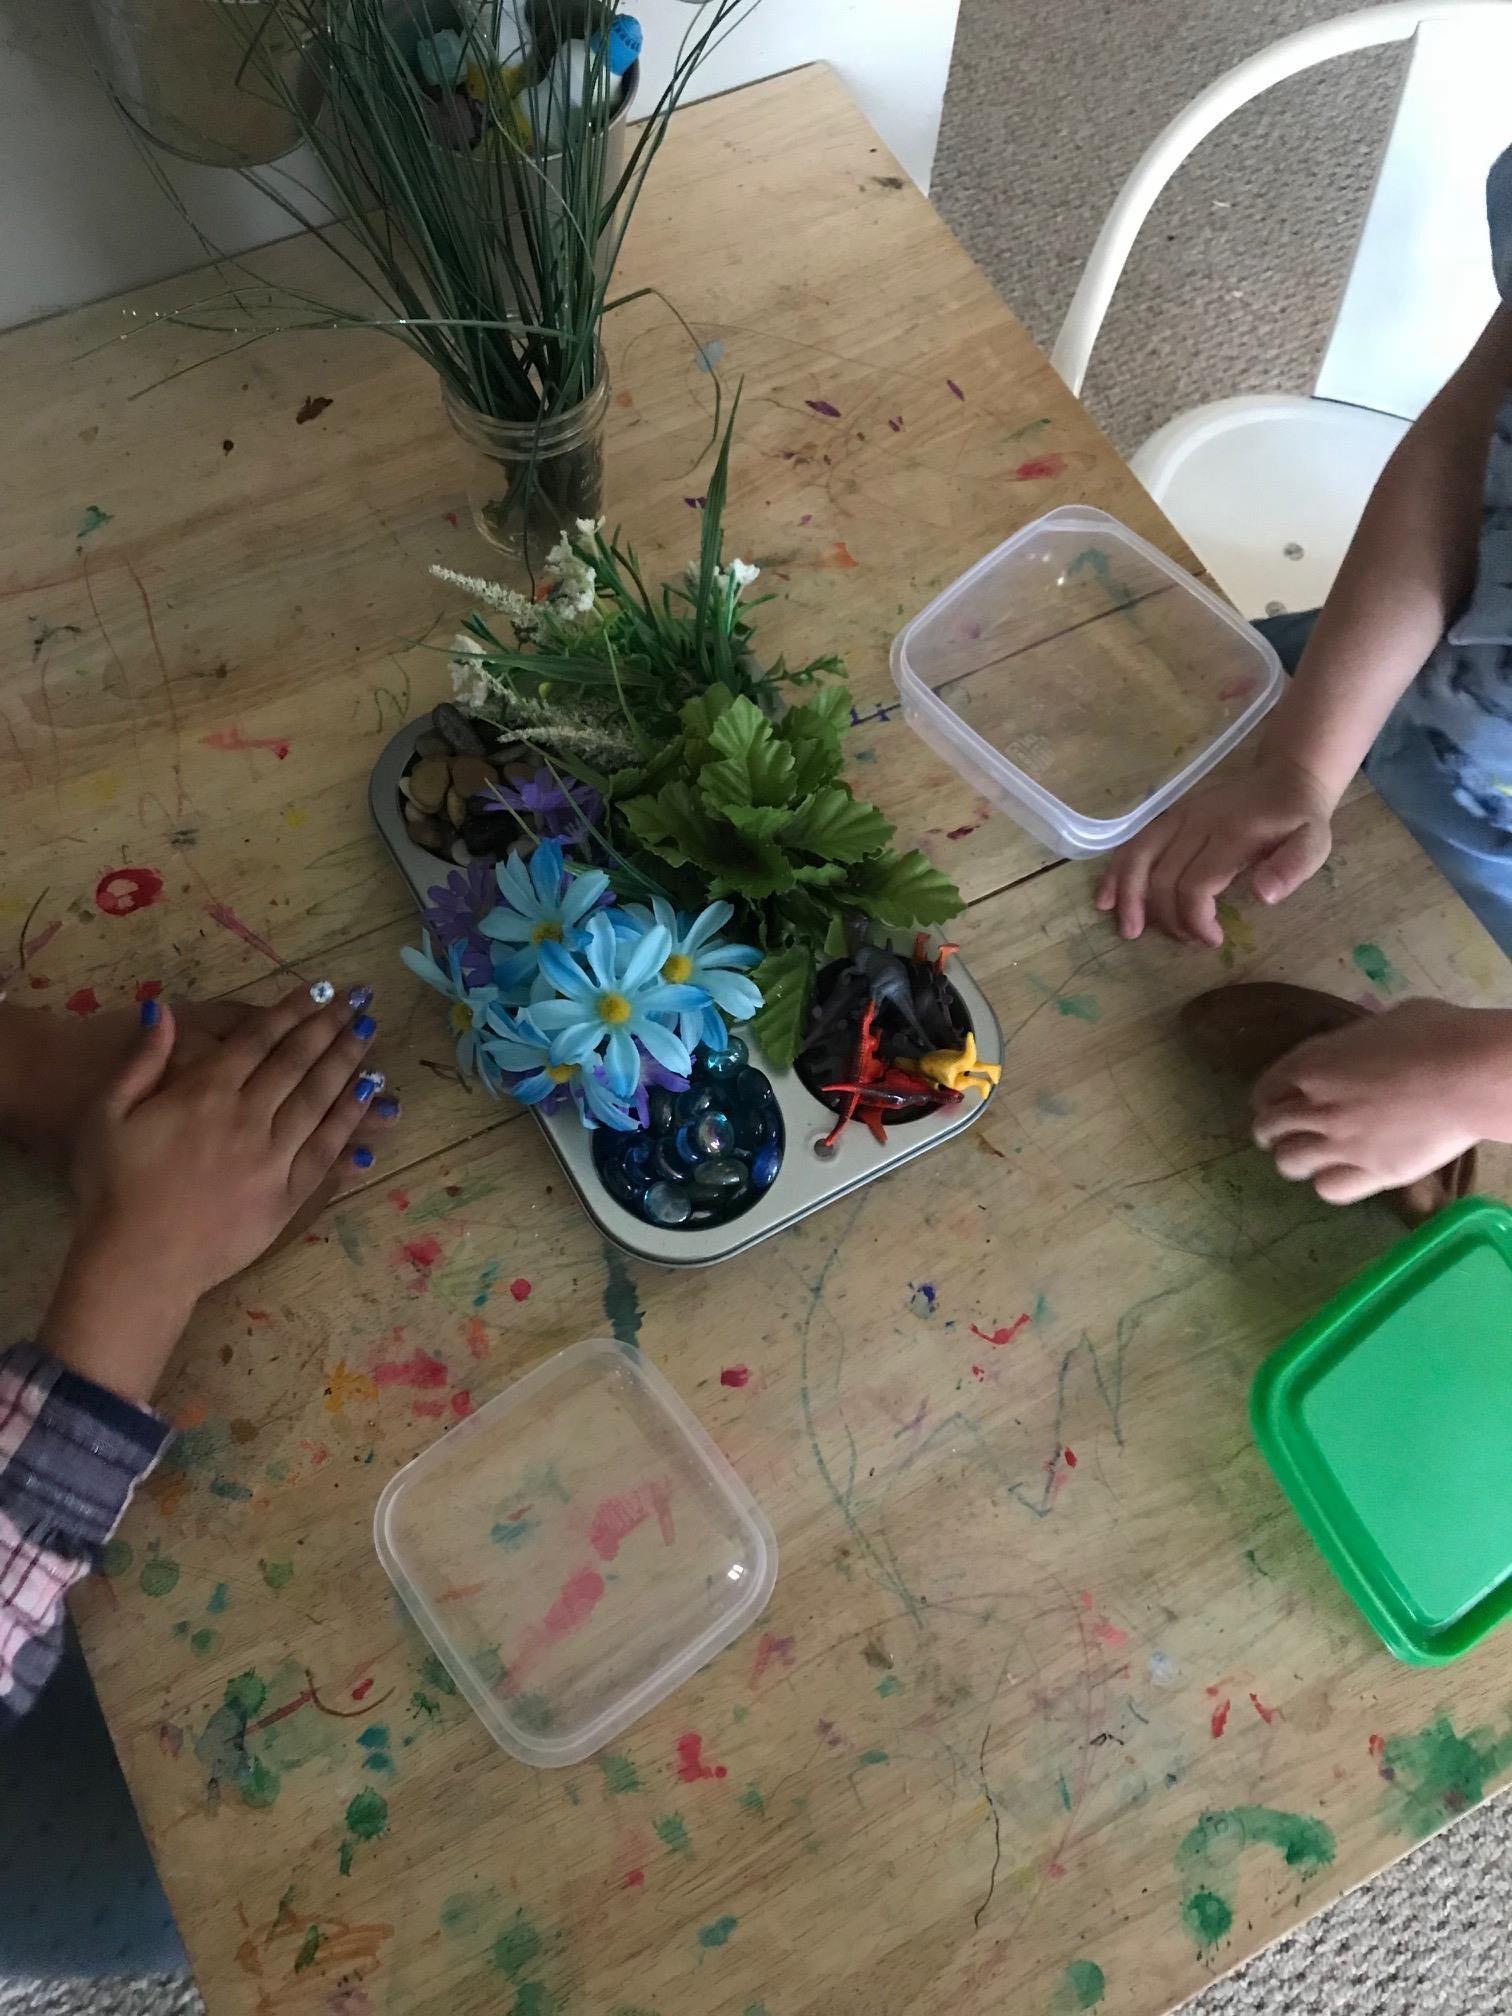
And we have. I put this invitation out a couple of days ago, and the kids have used it every day. Play dough is perfect for this because they can squish it into pretty much any shape they want and it will support all of their different plants, rocks, & dinos, without losing its shape. And everything comes apart easily at the end, so clean up is simple.

IMG_8847.jpg

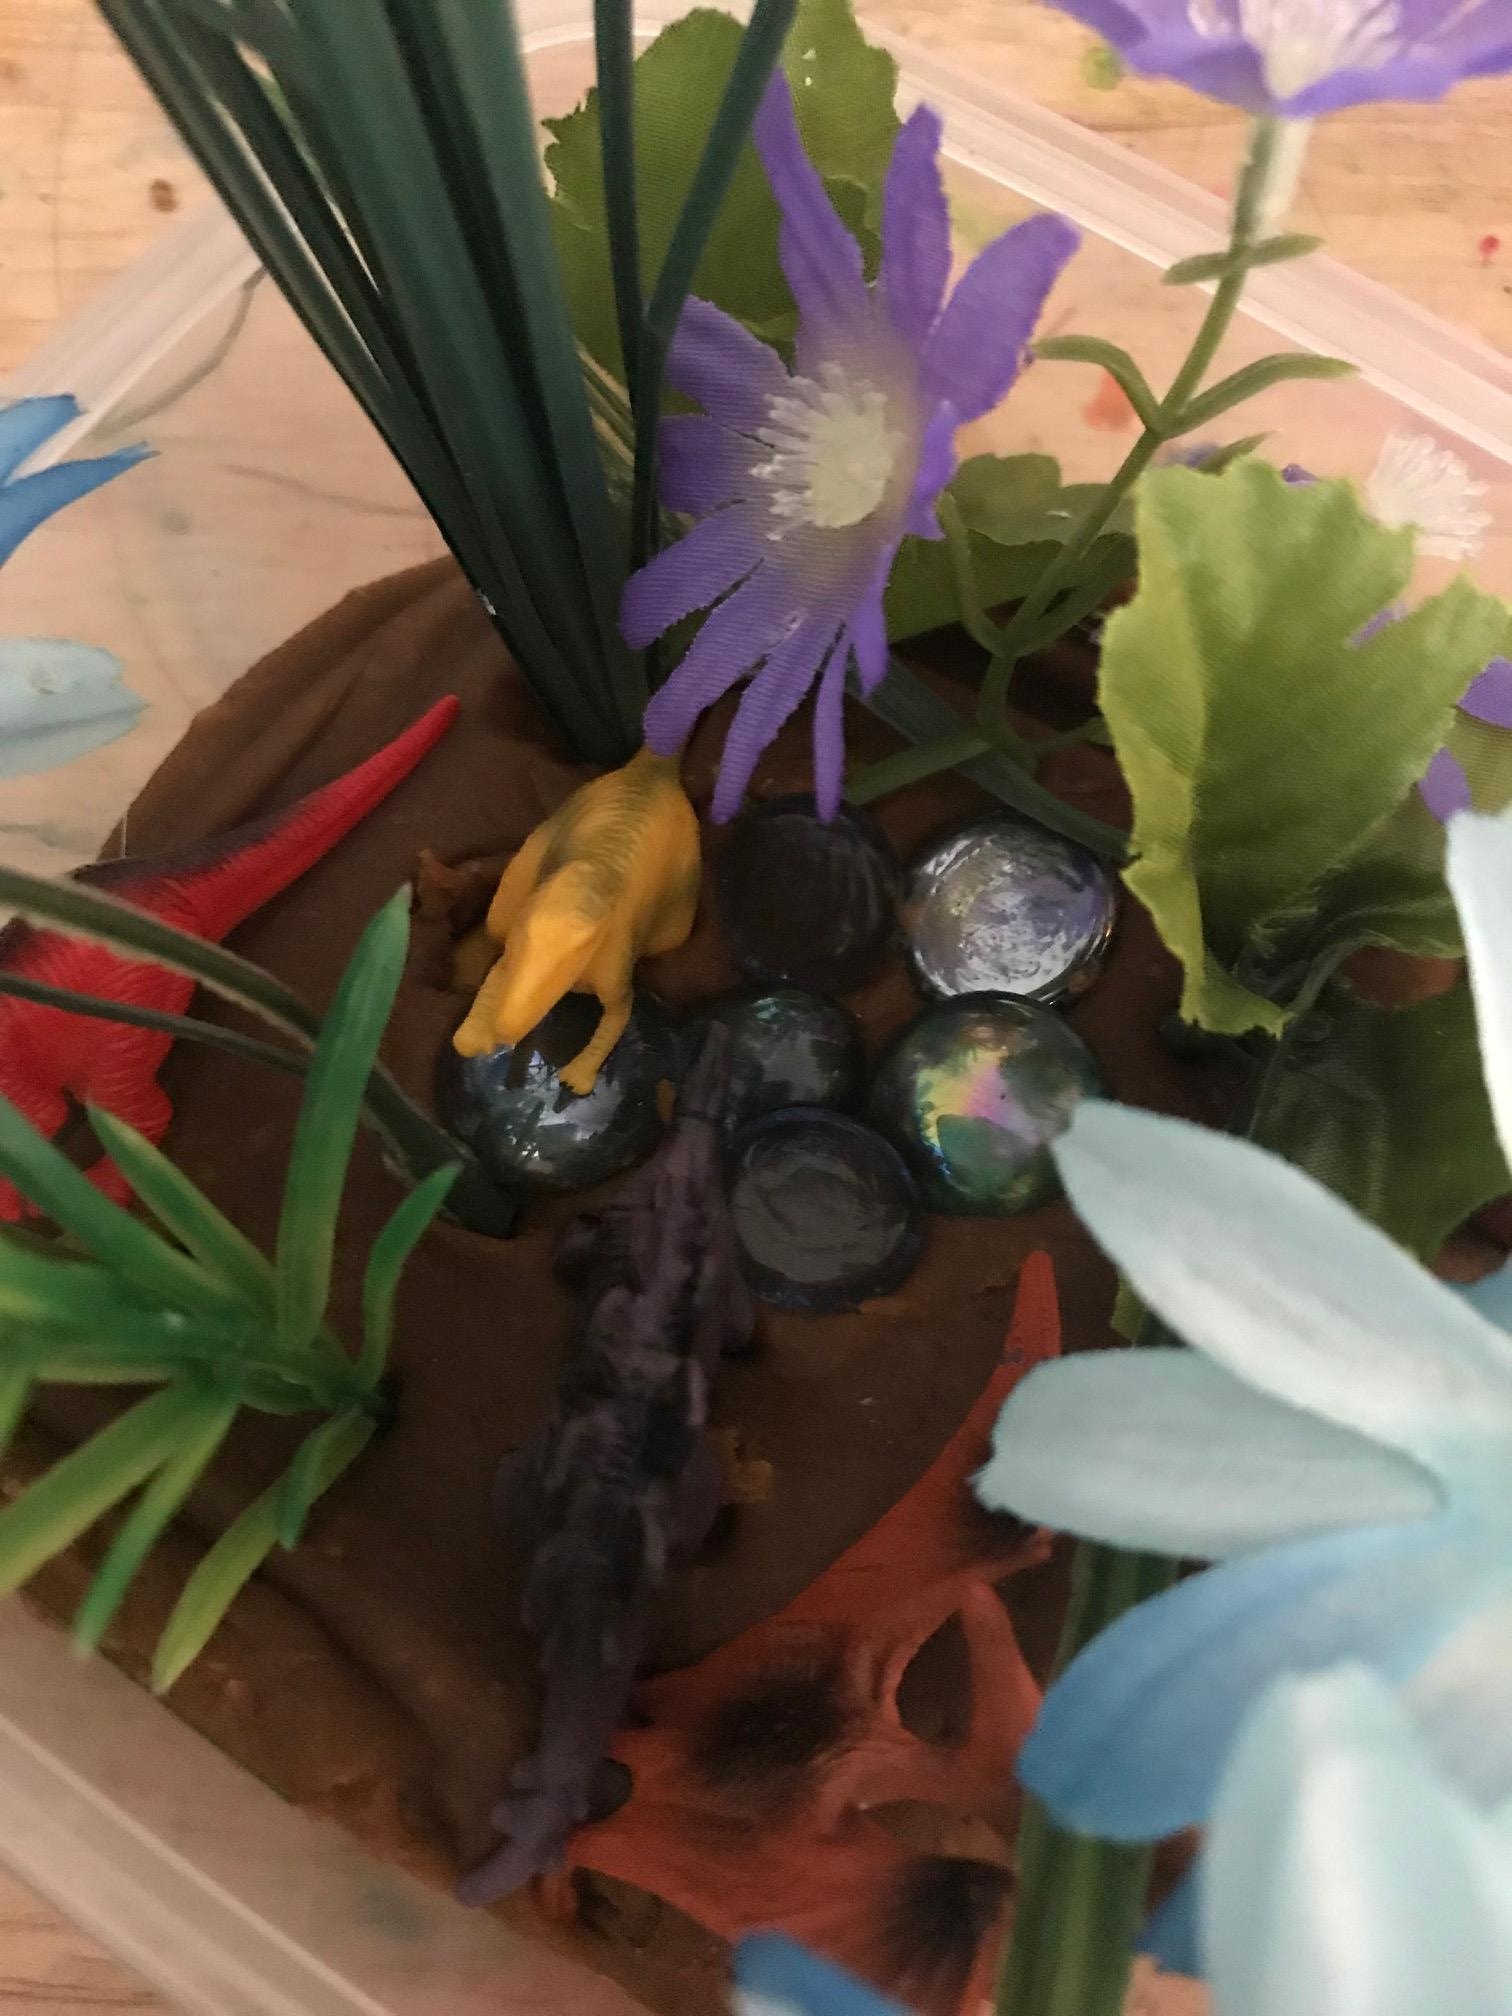
They've had lots of fun creating giant jungle worlds for the dinos to live in.

IMG_8837.jpg
IMG_8850.jpg

Here's a quick run down of what I gave them to play with. The whole set up cost me $4 (I already had all the play dough ingredients, dinos, and the small rocks and stones from other projects, but you can find everything except cream of tartar at the dollar store) and everything in it can be used for other art and play. First, I made a batch of brown play dough. I'll leave the recipe at the end of this post, but you can find it pretty much anywhere on Pinterest, because it's pretty common... in fact, we used to make play dough the same way when I was little. I bought two onion grass/butterfly bushes and two floral bouquets at the dollar store and took them all apart. I filled the sections of a muffin tin with all the floral pieces, some small river rocks, a mix of clear/blue/green glass stones, and some small dinosaurs, and set it out on the table with the play dough and some containers to build in. And then I let them have it.

IMG_8838.jpg
IMG_8855.jpg
IMG_8857.jpg

Here's the play dough recipe, in case you'd like to make your own. Or you could just buy a can of brown play dough for like 99 cents.

Easy Play Dough

  • 1 c. flour
  • 1/3 c. salt
  • 2 tsp. cream of tartar
  • 1 c. water
  • 1 TBSP. vegetable oil
  • food coloring in desired colors

Combine all ingredients in a small saucepan. Heat over medium-high heat, stirring constantly, until the dough forms a ball around the spoon. Remove from heat and turn dough out of pan onto counter (I usually put a sheet of parchment paper or one of my bamboo cutting boards underneath it). Allow to cool until you can handle it, then knead for a couple of minutes to even out the texture and remove any lumps. Allow to cool completely before play.

Crock Pot Shredded Pork Tacos

Last Tuesday Theo said to me, "Mommy, EVERY Tuesday should be Taco Tuesday!" (even though it wasn't). But I think he's kind of right; every Tuesday SHOULD be Taco Tuesday, at least for us.

I don't know about your house, but around here, sometimes it seems like no one can ever agree on a meal. With very few exceptions, there is always someone who doesn't like something about whatever it is we're having for dinner. Unless it's taco night. I think it's because they're so versatile: you can really make them with any meat (or none at all), and because we typically serve them bar-style, everyone can add the things they like and skip what we don't. Plus, they require very little prep work, which is a bonus for me.

IMG_8289.jpg

SO. In honor of Taco Tuesday, I'm sharing with you my favorite recipe for shredded pork tacos. I love making these because I can just throw the pork and seasonings in my crock pot a little before lunch time, turn it on low and let it go. Then at dinner time, all I have to do is shred the meat and get toppings ready, and everyone can have at it. This recipe will feed our family of 6 dinner with lots left over to either have for lunch or freeze for another night. And they're especially good for us to make during baseball season because we can easily take them on the go on nights we need to have dinner at the ball field.

IMG_8001.jpg

Crock Pot Shredded Pork Tacos

  • 4-5 lb. pork shoulder roast (or cut of your choice)
  • 1 medium onion, chopped
  • 5-6 cloves garlic, crushed (we like garlic a lot, but if you don't just use fewer)
  • Salt
  • Red pepper
  • Chili powder
  • Cumin
  • 3-4 bay leaves (dried)
  • Juice from 1 lime

Optional For Serving:

  • Rice
  • Black beans
  • Corn
  • Shredded lettuce
  • Tomatoes
  • Onions
  • Salsa
  • Guacamole
  • Sour cream
  • shredded cheese
  • Taco shells (hard or soft)
  • Tortilla chips

Put your roast in your crock pot. Top with garlic & onions. Season to taste with salt, red pepper, chili powder, & cumin. Squeeze juice from one lime over the roast and add bay leaves. Cover & cook on low 6-7 hours (or on high approximately 4 hours), until meat shreds easily. Remove bay leaves & shred. Top with your favorite taco fixings.

Enjoy! 


IMG_7992.jpg